
Installing solar panels and an inverter is the physical heart of going solar — everything before it is paperwork and planning, and everything after it is inspections. The actual install typically takes 1–3 days for a residential system, handled by a licensed crew, with the inverter being the single most important component determining how your system performs and how it’s monitored.
Step 1: Site Prep and Staging
Before any panels go up, the crew stages equipment, sets up fall-protection gear, and does a final walk of the roof to confirm the layout matches the engineered plan. Any last obstructions (vents, old antennas) are noted and worked around.
Step 2: Mounting the Racking
Racking is installed first — rails are attached to the roof through flashed penetrations (or ballasted for flat/low-slope roofs) that seal against leaks. Racking is leveled and spaced to the engineered layout before any panels are attached, since this determines the final tilt and alignment of the array.
Step 3: Installing the Panels
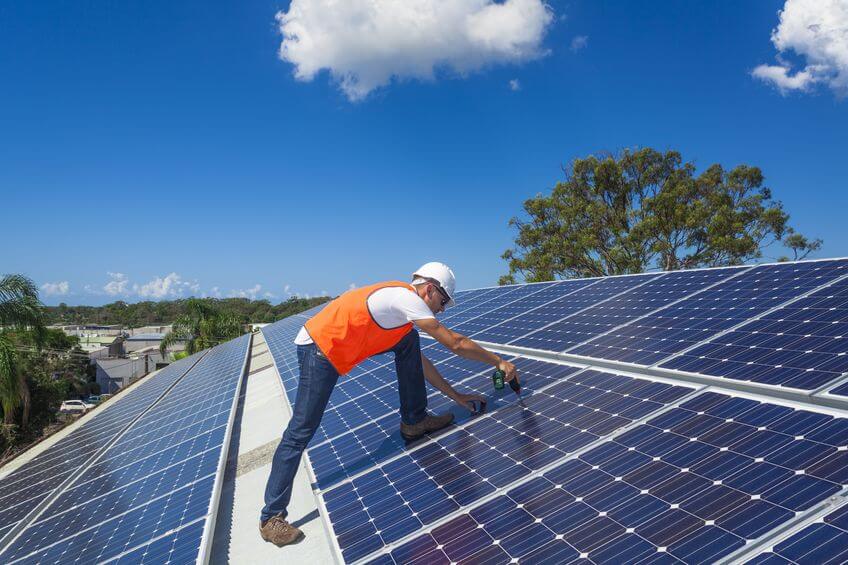
Panels are lifted to the roof and clamped onto the racking in the planned string configuration. Installers route the DC wiring from each panel along the racking to a central point where it will run down to the inverter and disconnects, using UV-rated PV wire and weatherproof connectors (MC4) throughout.
Step 4: Installing the Inverter
The inverter is the component that converts the DC electricity your panels produce into the AC electricity your home actually uses. Where it’s mounted and which type is used significantly affects both performance and future maintenance:
| Inverter Type | Mounting | Notes |
|---|---|---|
| String inverter | Wall-mounted near main panel | One unit for the whole array; lowest cost; shading on one panel affects the whole string |
| Microinverters | One per panel, on the roof | Panel-level optimization; best for shaded or complex roofs; higher cost |
| Power optimizers + string inverter | One per panel + central inverter | Middle ground — per-panel optimization with centralized conversion |
Most residential installs mount the string inverter (or the central inverter paired with optimizers) on an exterior or garage wall near the main electrical panel, in a shaded, ventilated spot — inverters generate heat and lose efficiency if they overheat.
Step 5: Electrical Connections and Rapid Shutdown
The inverter is wired to the home’s main electrical panel through a dedicated breaker, and a rapid shutdown system is installed per NEC 690.12 — this lets first responders de-energize the array at the roofline within seconds during an emergency. AC and DC disconnects are installed at code-required locations so the system can be isolated for service.
Step 6: Permitting and Interconnection
Your installer typically files for building and electrical permits before installation and submits the utility interconnection application in parallel. After installation, a local inspector checks the work for code compliance, then the utility reviews the interconnection application, may require a meter upgrade, and issues Permission to Operate (PTO) before the system can be legally turned on.
| Phase | Typical Timeline |
|---|---|
| Permitting (before install) | 1–3 weeks |
| Physical installation | 1–3 days |
| Inspection + utility interconnection | 2–6 weeks |
Costs
Installed residential solar systems typically run $2.50–$3.50 per watt in 2026, which includes panels, racking, inverter(s), wiring, permitting, and labor. A larger share of that cost goes to labor and balance-of-system components than most homeowners expect — panels themselves are often only 15–22% of the total price.
As of 2026, the Section 25D federal residential tax credit has expired (it ended December 31, 2025), so homeowners who buy and own their system outright no longer receive the 30% credit. The Section 48E commercial credit remains active through 2027 for installers offering leases and PPAs.
Ready to get your installation scheduled? Get a free quote from a vetted local installer: (855) 427-0058
Frequently Asked Questions
How long does it take to install solar panels and an inverter?
The physical installation typically takes 1–3 days depending on system size and roof complexity. Including permitting before and inspections/utility interconnection after, the full process usually runs 6–10 weeks from signed contract to Permission to Operate.
Where is the inverter usually installed?
String inverters are typically wall-mounted in a shaded, ventilated spot near the main electrical panel, often in a garage or on an exterior wall. Microinverters are mounted individually on the roof, directly beneath each panel.
What’s the difference between a string inverter and microinverters?
A string inverter is one central unit converting power for an entire string of panels, which is cost-effective but means shading on one panel can affect the whole string. Microinverters convert power at each individual panel, which costs more but optimizes each panel independently and performs better on shaded or complex roofs.
Can I turn my system on right after installation?
No. You need to wait for a local building inspection and utility Permission to Operate (PTO) before legally turning the system on, which typically takes 2–6 weeks after physical installation.
What is rapid shutdown and why is it required?
Rapid shutdown (required under NEC 690.12) lets first responders de-energize the solar array at the roofline within seconds during an emergency, protecting them from high-voltage DC wiring during firefighting or other emergency response.
How much does installation cost in 2026?
Installed residential solar systems typically run $2.50–$3.50 per watt, including panels, inverter, racking, wiring, permitting, and labor — panels themselves are usually only 15–22% of the total cost.
Does the federal tax credit still apply to installation costs in 2026?
Not for homeowners who buy and own their system — the Section 25D residential credit expired December 31, 2025. The Section 48E commercial credit remains active through 2027 for installers offering leases and PPAs.
Summing Up
Installing solar panels and an inverter follows a defined sequence: racking, panels, inverter, electrical connections and rapid shutdown, then permitting and utility interconnection before the system can legally go live. Your installer manages most of this process, but knowing the steps helps you understand what to expect and ask informed questions along the way. To get a free quote from a vetted local installer, call (855) 427-0058 or visit us.solarpanelsnetwork.com.
Updated