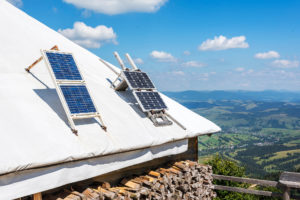
Solar panels have become a popular power source for homes and offices. They are usually planted on rooftops and absorb direct sunlight to generate electricity. It’s expected that you’ll see more of them as years pass by. But what about their portability?
To answer this question, you need to check out portable solar panels. These systems are the newcomers in the energy market and are popular among those on the move. So, you can take these with you on your next camping trip to power your appliances.
In case you’re unsure about these systems, you can always set up one yourself. This article will break down all the detailed steps needed to set up a portable solar panel system.
Contents
- 1 Key Takeaways
- 2 What Are Portable Solar Panels?
- 3 Steps To Set Up Your Portable Solar Panel
- 4 Advantages Of Using A Portable Solar Panel
- 5 Case Study: Efficient Setup and Use of Portable Solar Panel Systems
- 6 Expert Insights From Our Solar Panel Installers About Setting Up a Portable Solar Panel System
- 7 Experience Solar Excellence with Us!
- 8 Wrapping Up
Key Takeaways
- Portable solar panels are compact and versatile energy solutions ideal for camping, outdoor activities, and emergencies.
- Setting up a portable solar panel system involves determining your power requirements, selecting the right components, and connecting them properly, including solar panels, batteries, charge controllers, and inverters.
- Portable solar panels offer advantages such as portability, quick gadget charging, suitability for remote areas, durability in various weather conditions, and ease of installation without the need for roof modifications.
What Are Portable Solar Panels?
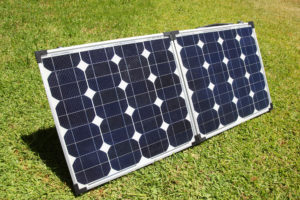
As the name suggests, you can take portable solar panels anywhere and use them away from your home. They were primarily manufactured as a backup power generating device when outdoors, such as camping or hiking trips. They have a very compact size and may have the size of a standard briefcase.
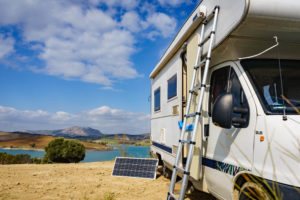
These portable systems are ideal for powering small appliances such as smartphones, laptops, and flashlights. Even though these panels may differ in size, the greatest advantage is that you can fit them in your car or your RV easily.
While standard rooftop solar panels produce approximately 365W of power, portable solar panels produce around 100W.
Some panels can offer even more power, such as 120W. These may come with additional accessories such as a kickstand, storage case, 5m cable, charge controller, and gadgets required to charge the battery.
If you check online, you’ll find plenty of options for portable solar panels. In general, they can be bought in a kit and come with a service warranty.

Steps To Set Up Your Portable Solar Panel
Now that you’ve got the basics, it’s time to set up your own portable solar system. Let’s begin!
Step 1: Figure Out The Required Power Amount
The first step in setting up your own portable solar panel is to determine the power requirement. You need to decide the intended use – do you want to take it for camping, boating, powering your RV, home use, or for emergencies?
Then, figure out the number of appliances you want to power up using the solar panel. Sum up the power consumption of these appliances. Based on these considerations, you’ll understand the wattage you require.
Suppose your calculation amounts to 100 watts. Then, a solar panel of 100 to 120 watts will be ideal. You can buy eight solar panels of 15 watts each and buy more later on if you need.
Step 2: Choose The Type Of Solar Panel
After understanding your power requirement, you now need to select the type and size of the solar panel. If you require a 100W solar panel, you can buy a single 100W panel or two 50W panels. Then, you can choose from rugged, regular, or flexible panels.
Regular solar panels are popular and available at affordable deals, whereas flexible panels are built to last for years. Most portable solar panels are extremely durable and come with stands to position them properly. Moreover, there are foldable solar panel options that are extremely convenient.
Some users like to buy all the solar panel accessories together in a kit. But buying the parts separately gives you more flexibility and helps you save money.
Step 3: Connect The Panels Properly
To obtain a high power output, you need to connect the solar panels in a specific combination. This will allow you to get the most out of your solar panels, making them power-efficient.
If you want the high output voltage, connect the panels in a series. On the other hand, if you want high output current, connect them in parallel. Alternatively, you can arrange the panels with a combination of series and parallel connections.
It will allow you to get an increased current and voltage. So, charging or powering up devices on a camping trip will be a breeze!

Step 4: Select Your Battery
You now need to select a battery for your solar panel system. It will be used to run the system at night. So, you have to figure out how much energy your system needs to store. For a 100W solar panel, around 400Wh of energy may be produced.
If you’re getting confused, then go for a 50 or 60 Ah battery. There are plenty of options for batteries but go for ones that are low-maintenance. Lithium and lead-acid batteries are good options.
Deep cycle marine batteries are power-efficient and are available at 160 Amp variants. They have very durable construction and a thick coating which prevents them from overheating. These batteries can also handle heavy currents and temperatures.
You can seek an expert’s advice while picking the battery.
Step 5: Select The Solar Charge Controller
A solar charge controller will be required for safely charging your portable panel. Standard solar charge controllers are about 12 or 24V and are quite affordable. You can also so go for PWM charge controllers, which are affordable but not that efficient.
As a recommendation, go for an MPPT solar charge controller. It is extremely efficient and will help you to maximize the power output of your portable solar panel.
Step 6: Get An Inverter
An inverter is required to operate and power all types of appliances with the help of your solar panel. It will convert the DC power from the batteries or the solar panel into AC. By handling all the power conversions properly, it keeps your appliances safe.
Moreover, the inverter device also protects your appliance from possible damage due to a voltage spike. So, you can opt for a pure sine wave power inverter with 75W or 200W, depending upon your solar panel. If you get a bigger solar panel later, you can choose a power inverter of higher wattage.
Step 7: Connect All Components
Now that you have gathered all the components for the solar panel, it’s time to connect them together. But first, you need to understand how the system works.
When the solar panel absorbs sunlight and generates electricity, it is transferred to the solar charge controller. Then, the controller charges the battery, and the power from the battery is transferred back to the controller.
The power goes to the solar inverter, which is ultimately responsible for powering or charging your appliances.
So, you need to connect your solar panel’s positive and negative wires to the positive and negative solar panel terminals on the controller. You can put electric tape on one of the solar panel terminals to prevent short circuits.
Now, you have to connect the positive and negative battery terminals on the controller to the positive and negative terminals of your battery. Similarly, you need to connect the positive and negative terminals of the inverter of the charge controller to the terminals of the power inverter.
Step 8: Light It Up
It’s finally time to test your entire setup! Firstly, you need to press the power button of the solar charge controller to power up the inverter. You can verify it by listening to the inverter’s fan, which will start running immediately. Then, press the On button behind the inverter to power up the AC output and the USB port.
Your system is all set! Plugin a smartphone charger or any other appliance using the USB port on the inverter to check if it’s working.
Tip: Make sure you set up the system in a place that has sufficient sunlight. Also, note down the amount of time the portable system takes to charge a device such as your laptop. It will help you understand the efficiency of the setup.

Advantages Of Using A Portable Solar Panel
Apart from offering you free energy, portable solar panels have the following benefits:
- The system is ideal for traveling or camping, and you can carry fewer charges with you.
- It is perfect for charging small gadgets quickly.
- It can be used to heat water in remote areas.
- Most portable systems are absolutely waterproof and can be used in all types of climatic conditions.
- The charge controller prevents overcharging and overheating of your devices.
- Folding solar panels offer greater flexibility and portability.
- Systems with a high power output might help you to charge your car’s battery.
- These systems are easy to install, and you won’t need to drill holes on your roof.
- They don’t take up much space and can be easily stored in cabinets and camper vans.
Case Study: Efficient Setup and Use of Portable Solar Panel Systems
Background
At Solar Panels Network USA, we focus on delivering versatile solar solutions that cater to various needs. This case study demonstrates the setup and effective use of a portable solar panel system, showcasing its benefits for outdoor enthusiasts and emergency preparedness.
Project Overview
Our client, an avid camper and outdoor enthusiast, sought a portable solar panel system to power essential appliances during camping trips. The goal was to create a reliable, easy-to-set-up system that could charge multiple devices and provide backup power in remote areas.
Implementation
We began with a comprehensive assessment of the client’s energy needs, including the types of devices to be powered and the expected duration of use. This assessment guided the selection of appropriate solar panels and components.
Detailed Process
Step 1: Determining Power Requirements
The client needed to power a smartphone, a laptop, a small portable fridge, and camping lights. We calculated the total wattage required and recommended a 100W solar panel setup, capable of generating sufficient power for these devices.
Step 2: Selecting Solar Panels
Given the power requirements, we chose a 100W foldable solar panel kit, which included the panel, a charge controller, cables, and a carrying case. The foldable design offered portability and convenience.
Step 3: Connecting the Panels
To achieve optimal performance, we connected the panels in a series-parallel configuration. This setup ensured a balanced output of voltage and current, enhancing efficiency.
Step 4: Choosing the Battery
We recommended a 50Ah lithium battery due to its lightweight and high energy density. This battery provided ample storage for the client’s needs and ensured consistent power availability.
Step 5: Selecting the Charge Controller
An MPPT (Maximum Power Point Tracking) charge controller was selected for its efficiency in maximizing power output from the solar panels. This choice ensured the battery was charged optimally.
Step 6: Choosing the Inverter
A pure sine wave inverter rated at 300W was chosen to convert DC to AC power, suitable for powering sensitive electronic devices without risk of damage.
Step 7: Connecting All Components
The solar panel, charge controller, battery, and inverter were connected as follows:
- Positive and negative wires from the solar panel to the charge controller.
- Charge controller output to the battery.
- Battery output to the inverter.
Step 8: Testing the Setup
The entire setup was tested by powering various devices. The inverter and charge controller performed as expected, efficiently converting and managing power.
Maintenance and Monitoring
A maintenance plan was established to ensure the system’s longevity and efficiency:
Regular Inspections: Scheduled checks for any signs of wear or damage to the panels, cables, and connectors.
Performance Monitoring: The client was provided with a monitoring tool to track energy production and battery status.
Cleaning Procedures: Regular cleaning of the panels to ensure maximum sunlight absorption.
Results
The portable solar panel system provided reliable power during camping trips, effectively charging all devices and operating the portable fridge. The client reported high satisfaction with the system’s performance and ease of use.
Summary
This case study highlights the effectiveness of portable solar panel systems for outdoor and emergency use. By selecting the right components and following a structured setup process, we provided the client with a versatile and reliable power solution. Regular maintenance and monitoring ensured the system’s continued efficiency and longevity.
Expert Insights From Our Solar Panel Installers About Setting Up a Portable Solar Panel System
Setting up a portable solar panel system is a straightforward process if you follow the correct steps. It’s crucial to determine your power requirements first to ensure you choose the right panel size and components.
Senior Solar Installer
Portable solar panels are an excellent choice for those on the move. Their compact and durable design makes them perfect for camping trips and emergencies, providing reliable power wherever you go.
Lead Solar Technician
Selecting high-quality components like an efficient charge controller and a reliable inverter is key to maximizing the performance and longevity of your portable solar panel system.
Solar System Engineer
Experience Solar Excellence with Us!
Trust in Solar Panels Network USA, where our seasoned experts deliver top-quality solar solutions for homes and businesses nationwide. With a legacy of countless successful installations and a commitment to sustainable energy, we’re your reliable partner in the solar journey. Ready for a brighter, eco-friendly future? Call us now at (855) 427-0058 and harness the power of the sun!
Wrapping Up
Portable solar panels are efficient, cost-effective, and offer you maximum convenience while traveling. They will prove to be lifesavers in regions without electricity and also help you during emergency cases. The best part? You can expand their power output by adding panels and batteries.
Even if the installation seems tricky, following our steps will make things way easier. If you still need support, ask someone who’s good with electric installations.
About the Author
Solar Panels Network USA stands at the forefront of solar energy solutions, driven by a team of seasoned solar engineers and energy consultants. With over decades of experience in delivering high-quality solar installations and maintenance, we are committed to promoting sustainable energy through customer-centric, tailored solutions. Our articles reflect this commitment, crafted collaboratively by experts to provide accurate, up-to-date insights into solar technology, ensuring our readers are well-informed and empowered in their solar energy decisions.

