
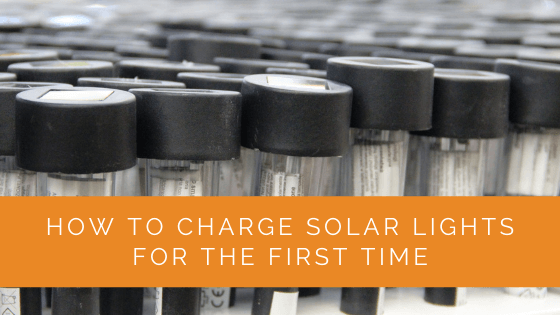
To charge solar lights for the first time, place them in direct sunlight for a full 8–10 hours with the on/off switch set to ON before their first night of use. Before doing this, remove any protective film from the solar panel, make sure the switch is in the on position, and check that no battery isolation tab is blocking the battery contacts. Most solar lights arrive with a partially depleted battery that needs a full initial charge to perform at rated capacity.
Before You Charge: Setup Checklist
Before placing your solar lights in sunlight for the first charge, complete these steps to avoid the most common first-time setup mistakes:
1. Remove the protective film from the solar panel. Most solar lights ship with a thin transparent film covering the solar panel to protect it from scratches during shipping. This film significantly reduces charging efficiency — in some cases blocking the panel almost entirely. Look for a slightly raised edge, peel tab, or difference in sheen on the panel surface. Peel it off completely before charging. If adhesive residue remains, clean it with a soft cloth and a drop of isopropyl alcohol.
2. Locate and set the on/off switch to ON. Solar lights typically ship with the switch set to OFF to prevent battery drain during transit and storage. The switch is usually on the underside of the light housing or inside the battery compartment cover. Slide or toggle it to the ON position before your first charge. With the switch OFF, some charge controllers won’t allow the battery to charge properly.
3. Check for a battery isolation tab. Some lights include a small plastic tab inserted between the battery and the battery contact to prevent discharge during long-term storage. Look inside the battery compartment for a thin strip of plastic — usually a transparent or white tab that prevents the battery from making contact. Pull it out completely. If this tab remains in place, the light won’t operate at all regardless of charging.
4. Check that batteries are installed. Most solar lights come with NiMH batteries pre-installed, but a few ship with batteries packaged separately in the box. If the light doesn’t work at all after a full charge, double-check that batteries are physically in the compartment and that the contacts are clean and making good contact.
How to Charge Solar Lights for the First Time
Step 1: Choose a location in direct sunlight. The solar panel must receive unobstructed sunlight — not filtered through a window (standard glass blocks 50–70% of useful solar wavelengths), not in dappled shade from a tree canopy, and not in a location shaded by a fence or building. Direct outdoor sunlight is required. Face the panel toward the south (in the northern hemisphere) and ensure no objects shade it during the peak hours of 10 AM–3 PM.
Step 2: Leave for a full day in direct sunlight. For the first charge, allow 8–10 hours of direct sunlight exposure — a full clear day. Many solar lights arrive from the factory with the battery at 20–40% charge. The first full charge from sunlight brings the battery to 100% and allows the charge controller to calibrate properly. Don’t stop the first charge early after only a few hours.
Step 3: Keep the switch in the ON position during charging. Many people assume the light should be in the OFF position while charging. For most solar lights, keeping the switch ON during daytime charging is correct — the light sensor (LDR) detects daylight and keeps the LED off while the panel charges the battery. Setting it to OFF during daytime may prevent the charge controller from properly cycling. Check your specific model’s instructions, but ON during daytime is the standard.
Step 4: Test after the first full charge. After a full day of direct sunlight, bring the light to a completely dark area or cover the solar panel with your hand. The LED should turn on within 5–15 seconds. If the light activates, setup is successful — install it in its final location. If the light doesn’t activate after a full day’s charge, proceed to troubleshooting.
How Long Does the First Charge Take?
Most solar garden lights require 6–8 hours of direct sunlight for a full first charge. The actual time depends on:
Solar panel size: Larger panels (higher milliamp output) charge faster. Small pathway lights with tiny panels (1–2 cm²) may need a full 8–10 hours to fully charge even a small NiMH cell. Larger flood or spotlight models with bigger panels typically reach full charge faster.
Battery capacity: A larger-capacity battery requires more energy to fill. Budget pathway lights may have 200–400 mAh cells; mid-range security lights may have 1,200–2,000 mAh cells that take proportionally longer to charge from the same panel output.
Sunlight intensity: On a clear summer day, a south-facing panel in the continental US receives approximately 1,000 W/m² at peak. On a hazy or overcast day, irradiance drops to 100–300 W/m², extending charge time by 3–5×. Always give the first charge on the clearest day available.
Battery initial state: A battery at 10% charge needs more time to reach 100% than one that arrived at 50%. You don’t know the state of charge when you unbox a new light — assume low and give it the full 8–10 hours.
First Night Runtime: What to Expect
After the first full charge, your solar light’s first-night runtime depends on the battery capacity and LED wattage. Typical runtimes by light type after a full summer-day charge:
Small pathway lights: 6–8 hours at full brightness; may switch to dim mode to extend to 10–12 hours
Solar spotlights: 4–8 hours depending on LED wattage setting
Security/flood lights: 4–8 hours at high brightness; motion-triggered lights conserve battery by activating only on motion detection
Solar string lights: 6–8 hours on a consistent charge
Solar lanterns: 8–12 hours at low brightness settings
Note that first-night runtime is often shorter than manufacturer claims. Manufacturer brightness and runtime specs are tested under ideal lab conditions (STC: 1,000 W/m² irradiance, 25°C, 8 hours charging). Real-world runtimes in most locations will be 70–90% of the stated maximum on average days, improving to the stated maximum on the best summer days.
Troubleshooting: Light Doesn’t Work After First Charge
If your solar light doesn’t activate after a full day of direct sunlight, work through these checks:
Confirm the test is correct: Cover the solar panel completely with your palm in a fully dark room with the switch ON. If it doesn’t turn on within 15 seconds, it’s not detecting darkness — the issue is with the light sensor, battery, or circuit, not just the threshold sensitivity.
Check the switch: Is the switch physically set to ON? Some switches are stiff and may not have fully engaged. Press it firmly in the ON direction.
Inspect the battery compartment: Open the battery compartment and verify the batteries are correctly installed (polarity matching the + and – markings), no tab or film is blocking the contacts, and the contacts are clean and not corroded. Press the batteries firmly into place and close the cover.
Replace the batteries: If the light still doesn’t work, replace the batteries with fresh NiMH cells of the same voltage (typically 1.2V per cell) and capacity. Do not use alkaline batteries — alkaline batteries are not rechargeable and will be overcharged and damaged (or possibly leak) by the solar charge circuit. Use only rechargeable NiMH batteries of the same or similar capacity as the originals.
Try a different charging location: Charge for a second full day in the absolute sunniest, most direct-sunlight location you have. If the first charge location had any filtering (through a screen, near a window, partial shade at any time), this alone may have prevented a full charge.
Frequently Asked Questions
Can I charge solar lights indoors for the first time?
Indoors near a window gives significantly less light than direct outdoors. Standard glass blocks 50–70% of the ultraviolet and near-infrared wavelengths that solar cells are most responsive to. Low-E glass (common in modern double-pane windows) blocks even more — up to 90% of useful solar radiation. Indoor charging through a window is approximately 5–15% as effective as outdoor charging. For the first charge, always use direct outdoor sunlight.
Should I charge solar lights before first use?
Yes — always give solar lights a full charge before their first night of use. Batteries shipped at partial state of charge will not provide the stated runtime and may leave the light dim or dark before the night is over. A full first charge ensures you see the light’s true performance from day one.
Can I use a USB cable to charge solar lights for the first time?
Many modern solar lights include a USB-C or micro-USB charging port that allows direct charging from a power bank or USB wall charger. If your light has this port, using it for the first charge is perfectly fine — it will deliver a full, fast charge without depending on weather conditions. After the first USB charge, switch to solar charging for day-to-day use.
How many days does it take for a solar light to work at full brightness?
One full day of direct sunlight is sufficient for the first full charge, and the light should perform at full brightness on the first night after that initial charge. Performance doesn’t “improve” over multiple cycles for most modern NiMH battery solar lights. If your light isn’t at full brightness after the first full charge, the issue is likely inadequate sunlight during charging, a battery problem, or a solar panel coverage issue (protective film, dirt, or shading).
Summing Up
Charging solar lights for the first time requires three things: removing the protective film from the solar panel, switching the light to the ON position, and placing it in direct outdoor sunlight for a full 8–10 hours. Most problems with “defective” new solar lights trace back to one of these missed steps — particularly leaving the protective film in place or failing to switch the light on before charging. After the first successful full charge, your solar light should activate automatically at dusk and illuminate through the night based on its rated battery capacity. If issues persist after a full charge in direct sunlight, start troubleshooting with fresh NiMH replacement batteries.
Updated