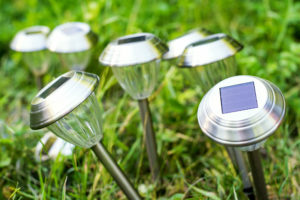
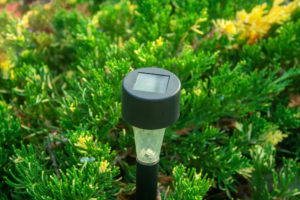
Solar lights are a fantastic eco-friendly lighting solution, harnessing the sun’s power to illuminate our outdoor spaces. However, one common issue that solar light owners may encounter is a broken wire, which can cause the lights to malfunction or stop working altogether. In this article, we will guide you through fixing a broken wire on solar lights, ensuring you can enjoy the benefits of sustainable lighting again.
Contents
- 1 Understanding the Components of Solar Lights
- 2 Identifying a Broken Wire
- 3 Tools and Materials Needed
- 4 Step-by-Step Guide to Fixing a Broken Wire on Solar Lights
- 5 Additional Tips for Maintenance and Prevention
- 6 Case Study: Repairing Broken Wires in Community Solar Lighting Systems
- 7 Expert Insights From Our Solar Panel Installers About How to Fix Broken Wire on Solar Lights
- 8 Our Expertise in Solar Lights
- 9 Conclusion
Understanding the Components of Solar Lights
To effectively fix a broken wire, it’s essential to understand the components that make up solar lights. These components include the solar panel, battery, LED bulbs, and connecting wiring. The solar panel absorbs sunlight and converts it into electrical energy stored in the battery. The wiring is the pathway for the electricity to flow, allowing the LED bulbs to emit light when the sun goes down.
Identifying a Broken Wire
Before diving into the repair process, it’s crucial to confirm whether a broken wire is the culprit behind the solar light’s malfunction. Common symptoms of a broken wire include intermittent lighting, complete darkness, or flickering. Start by visually inspecting the solar light, looking for any visible signs of wire damage, such as fraying or cuts. If the damage is not apparent, using a multimeter can help test the wires’ continuity and pinpoint the breakage’s exact location.

Tools and Materials Needed
You’ll need a few tools and materials to fix a broken wire on solar lights. Ensure you have the following items on hand before starting the repair process:
- Wire strippers: These will help you strip the insulation from the wire ends.
- Soldering iron: A soldering iron melts the solder and joins the wires.
- Solder: This is a metal alloy used to create a strong and reliable connection between wires.
- Heat shrink tubing: It provides insulation and protection to the soldered connection.
- Electrical tape: An alternative to heat shrink tubing, electrical tape can also be used for insulation.
- Heat gun: If you’re using heat shrink tubing, a heat gun will shrink it to create a tight seal.
Step-by-Step Guide to Fixing a Broken Wire on Solar Lights
Now let’s walk through the process of fixing a broken wire on solar lights:
Step 1: Safety Precautions
Before beginning any electrical work, it’s crucial to prioritize safety. Make sure to disconnect the solar light from any power source and wear appropriate safety gear, such as gloves and safety glasses.
Step 2: Disassembling the Solar Light
Carefully disassemble the solar light to access the internal wiring. This typically involves removing screws or clips that hold the light housing together. Take note of the disassembly process to ensure you can reassemble the light correctly later.
Step 3: Locating the Broken Wire
Systematically trace the wires from the solar panel to the battery and LED bulbs, looking for any signs of damage. If the breakage point is not visually apparent, use a multimeter to test the continuity of the wires. Set the multimeter to the continuity or resistance setting and touch the probe to each end of the wire. If the multimeter reads close to zero, the wire is intact. If there is an open loop or significantly high resistance, it suggests a broken wire.
Step 4: Removing the Damaged Section
Once you have located the broken wire, use wire strippers to cut out the damaged section carefully. Make clean and precise cuts, ensuring the wire ends are exposed and ready for soldering.
Step 5: Stripping and Soldering
To establish a solid connection, it’s important to strip the insulation from the wire ends before soldering. Use wire strippers to remove about half an inch of insulation from each end of the wire. This will expose the conductive metal underneath.
Next, heat the soldering iron and apply a small amount of lead-free solder to the tip. Hold the soldering iron against one of the stripped wire ends, allowing the heat to transfer and melt the solder onto the wire. Ensure that the solder flows evenly, creating a secure bond. Repeat the process with the other stripped wire end.
Step 6: Insulating the Connection
Once the wires are soldered together, insulating the connection is important to prevent any short circuits or further damage. There are two common insulation methods: heat shrink tubing or electrical tape.
Using heat shrink tubing, slide a suitable size over the soldered connection. Use a heat gun to apply heat evenly to the tubing, causing it to shrink and tightly seal the connection. Be careful not to overheat or burn the tubing.
Alternatively, you can wrap the soldered connection with electrical tape, completely covering the exposed wires. Stretch the tape slightly as you wrap it to create a tight and secure seal. Make sure there are no exposed wires or solder.
Step 7: Reassembling the Solar Light
With the broken wire now fixed and insulated, it’s time to reassemble the solar light. Follow the reverse order of the disassembly process, ensuring that all components are properly aligned and secured. Insert the battery, attach the LED bulbs, and close the light housing with screws or clips.

Additional Tips for Maintenance and Prevention
To keep your solar lights in optimal condition and prevent future wire breakages, consider the following tips:
- Regularly inspect your solar lights for any signs of wear, including frayed wires or loose connections.
- Clean the solar panels periodically to ensure maximum sunlight absorption.
- Protect the lights from extreme weather conditions, such as heavy rain or snow, by positioning them appropriately or using protective covers.
- Replace the batteries as needed to maintain optimal performance.
- If you encounter more complex issues or are unsure about handling electrical repairs, consult a professional electrician for assistance.
Case Study: Repairing Broken Wires in Community Solar Lighting Systems
Background
Solar Panels Network USA partnered with a local community to address frequent issues with their solar lighting system. The solar lights, essential for illuminating public pathways and recreational areas, were often malfunctioning due to broken wires. Our objective was to implement a systematic approach to diagnosing and repairing these issues, ensuring reliable and continuous lighting.
Project Overview
The community’s solar lighting system comprised numerous solar lights installed along pathways and common areas. Over time, several units stopped functioning, causing inconvenience and safety concerns. The primary issue identified was broken wiring, which disrupted the electrical flow necessary for the lights to operate.
Implementation
Identifying Faults
Our team conducted a thorough inspection of the solar lights. We used multimeters to test the continuity of the wires, efficiently pinpointing the exact locations of the breakages. This precise identification process minimized unnecessary disassembly and focused repairs on the faulty sections.
Repairing Broken Wires
Step-by-Step Repair Process
- Safety Precautions: We ensured all solar lights were disconnected from any power source. Our technicians wore appropriate safety gear, including gloves and safety glasses.
- Disassembling the Solar Light: Carefully opening the light housing, we exposed the internal components and wiring.
- Locating the Broken Wire: Using multimeters, we traced the wires from the solar panel to the battery and LED bulbs. Breakage points were marked for repair.
- Removing the Damaged Section: Wire strippers were used to cleanly cut out the damaged wire sections, preparing the ends for soldering.
- Stripping and Soldering: We stripped about half an inch of insulation from each wire end. The soldering iron was heated, and a small amount of lead-free solder was applied to the wire ends, creating strong, reliable connections.
- Insulating the Connection: Heat shrink tubing was slid over the soldered connections and heated using a heat gun, creating a tight seal. This method ensured excellent protection against moisture and physical stress.
- Reassembling the Solar Light: Reassembled the solar light, ensuring all components were securely aligned and connected.
Maintenance and Prevention
Post-repair, we implemented regular maintenance schedules to inspect the solar lights for signs of wear and tear. Solar panels were cleaned periodically to ensure maximum efficiency, and the lights were positioned to avoid extreme weather exposure. Additionally, we educated the community on replacing batteries and identifying potential issues early.
Results
The systematic approach to diagnosing and repairing broken wires significantly improved the reliability of the community’s solar lighting system. The repaired lights provided consistent illumination, enhancing safety and usability of public spaces. Regular maintenance practices ensured long-term performance and reduced the frequency of similar issues.
Summary
This case study demonstrates the importance of a thorough and systematic approach to repairing broken wires in solar lighting systems. By leveraging precise diagnostic tools like multimeters and employing robust repair techniques such as soldering and heat shrink tubing, Solar Panels Network USA successfully restored functionality to the community’s solar lights. Our commitment to sustainable and reliable solutions continues to drive our efforts in enhancing solar lighting systems for various applications.
Expert Insights From Our Solar Panel Installers About How to Fix Broken Wire on Solar Lights
Identifying the exact point of wire breakage is crucial. Using a multimeter can save you a lot of time and effort by precisely locating the fault, ensuring you fix only what’s necessary.
Senior Solar Installer
Soldering is the best method to ensure a durable connection between broken wires. It creates a strong bond that can withstand outdoor conditions better than simple twisting or taping.
Lead Solar Technician
Heat shrink tubing provides superior insulation for soldered wires. It seals the connection effectively, preventing moisture ingress and potential short circuits, which are common issues in outdoor setups.
Solar Installation Expert
Our Expertise in Solar Lights
At Solar Panels Network USA, we’re here to provide you with valuable information and support regarding solar lighting. With our experience and understanding of the solar lighting industry, our team of experts is prepared to assist you in finding the right lighting solution for your needs. Whether you’re interested in improving your outdoor spaces, conserving energy, or adopting a more sustainable approach, we’re well-equipped to help. Please feel free to contact us with any questions or inquiries.
Conclusion
Fixing a broken wire on solar lights is a rewarding and eco-friendly endeavor. By following the step-by-step guide outlined in this article, you can easily repair the faulty wire and restore the functionality of your solar lights. Remember to prioritize safety, use the proper tools and materials, and take preventative measures to ensure the longevity of your solar lighting system. With a little effort and know-how, you’ll enjoy the benefits of sustainable lighting provided by solar power for years to come.
About the Author
Solar Panels Network USA stands at the forefront of solar energy solutions, driven by a team of seasoned solar engineers and energy consultants. With over decades of experience in delivering high-quality solar installations and maintenance, we are committed to promoting sustainable energy through customer-centric, tailored solutions. Our articles reflect this commitment, crafted collaboratively by experts to provide accurate, up-to-date insights into solar technology, ensuring our readers are well-informed and empowered in their solar energy decisions.

