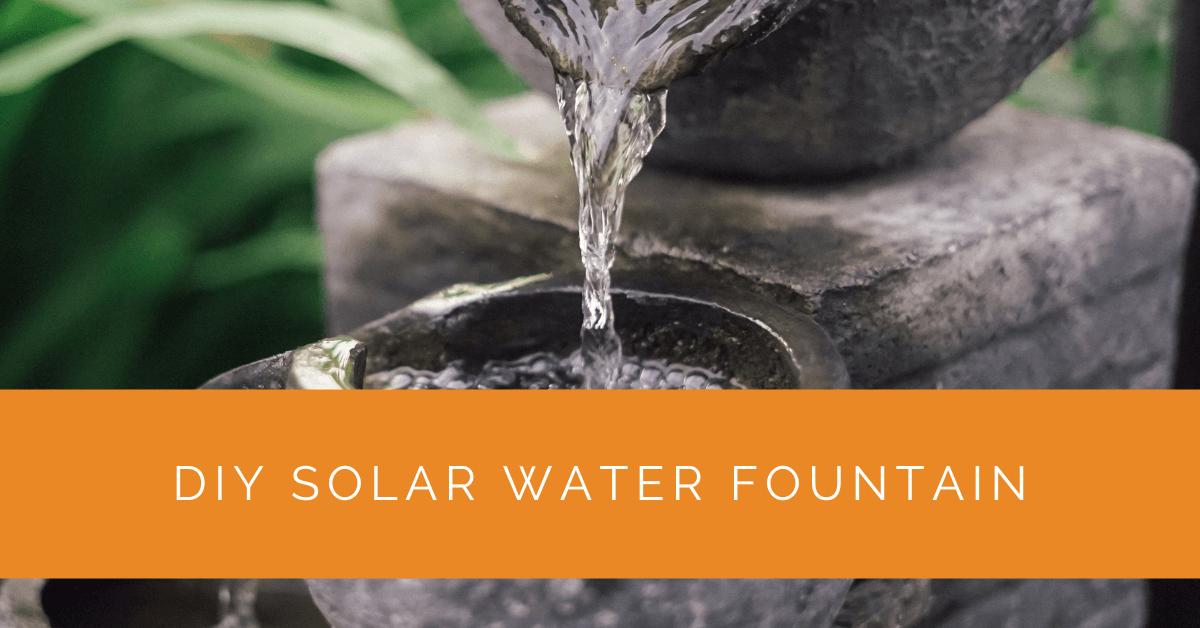
How to Build a DIY Solar Water Fountain
A solar-powered water fountain adds elegant ambiance to any garden, patio, or balcony while requiring zero electricity and no plumbing. Sunlight powers a small pump circulating water in a loop, creating soothing flowing water sounds and mesmerizing movement. Build a DIY solar fountain in one afternoon for $30-80, compared to $150-400 for commercial models.
This guide covers four fountain designs from simple single-basin styles to tiered multi-basin systems, component selection, assembly instructions, and seasonal maintenance.
Understanding Solar Fountain Components
Every solar fountain has four essential parts:
Solar panel: A small photovoltaic panel (typically 1-5W) directly powers the pump whenever sunlight hits it. No battery or wiring to outlets is needed; sunlight immediately creates flow.
Submersible pump: A small electric pump (6-24V DC, 0.5-2 watts) sits submerged in the basin, drawing water through an intake tube and pushing it through an outlet nozzle at rates of 100-600 gallons per hour depending on pump size.
Basin or reservoir: A waterproof container holds the circulating water. Typical volumes range from 5 gallons for tabletop fountains to 50+ gallons for large garden installations.
Nozzle or spillway: An outlet fitting directs water flow into cascading tiers, sprays, or gentle spillway patterns. Multiple nozzle types create different visual effects.
Water circulates continuously during daylight in a closed loop: the pump draws water from the basin bottom, pushes it upward and outward through a nozzle, gravity returns it to the basin, and the cycle repeats indefinitely.
Simple Floating Fountain (5-Minute Assembly)
The fastest DIY solar fountain uses a floating solar panel to power a small pump submerged in a birdbath, pond, or large planter basin.
Materials:
- Floating solar fountain kit ($20-40 with panel, pump, and nozzles)
- Existing basin, birdbath, or large planter (or purchase a ceramic basin for $20-30)
- Pebbles or aquatic plants (optional decoration, $5-10)
Assembly:
- Fill the basin with water to 3-6 inches depth.
- Remove the floating solar panel from the kit and place it on the water surface; magnetic connectors attach the pump cable automatically.
- Submerge the pump intake tube at the basin center, securing it with a weight or stake to prevent floating.
- Attach the outlet nozzle; most kits include 3-5 interchangeable nozzles for spray, mist, or gentle bubble patterns.
- Turn the panel toward the sun (south-facing in the Northern Hemisphere). Sunlight activates the pump within seconds.
Performance: A 2W floating kit delivers 80-200 gallons per hour depending on pump size. On a sunny day (6+ hours peak sun), water circulates continuously without pausing. On cloudy days, the pump slows but continues operating at reduced flow.
Advantages: No assembly, no tools required, works immediately, portability allows moving the fountain around the garden as sun angle changes seasonally.
Disadvantages: Limited to shallow basins without risers (tiering not feasible), floating panels can blow away in wind (secure with a lightweight tether if needed).
Tabletop Tiered Fountain with Dedicated Panel
This design separates the solar panel from the fountain basin, allowing placement of the fountain in shade while the panel sits in full sun nearby. Multiple water tiers create cascading effects.
Materials:
- 2-3W solar panel ($15-25)
- 6V or 12V submersible pump with 6-10 foot power cord ($20-35)
- Ceramic or terracotta tiered planter with 3-4 basins ($30-50)
- Vinyl tubing to fit pump outlet (½-inch ID, 10 feet) (~$5)
- Small aquatic foam or pebbles for basin bottoms (~$10)
- Waterproof silicone sealant (~$5)
Total cost: $85-160
Assembly:
- Inspect the tiered planter for leaks; apply waterproof silicone sealant to all interior seams and allow to cure 24 hours.
- Drill a hole in the bottom tier sized for the vinyl tubing (use a ½-inch drill bit for typical vinyl tubing) or drill near the rim if bottom drainage is undesirable.
- Insert vinyl tubing into the hole, sealing around it with aquarium sealant.
- Submerge the pump in the lowest basin and route the power cord toward the solar panel location.
- Connect the vinyl tubing to the pump outlet; route it upward through the tiered structure, hiding it behind the planter edge.
- At the top tier, position the tubing outlet to direct water cascading downward. Trim the tubing so the outlet sits just above the upper basin rim.
- Place the solar panel on a nearby south-facing surface, pole-mounted or ground-mounted at 45°.
- Fill the bottom basin with water until it overflows the first tier, establishing continuous circulation.
Performance: A 2-3W panel with a 12V pump delivers 200-400 gallons per hour, creating visible water cascades from tier to tier. In direct sun, each tier fills and overflows rhythmically. On cloudy days, water still circulates but with gentler flow.
DIY Barrel or Pot Fountain with Custom Spillway
Upcycled containers—old ceramic pots, rain barrels, wooden half-barrels, or decorative urns—become elegant fountains with a simple spillway modification.
Materials:
- Large container (15-50 gallons): ceramic pot, terracotta planter, whiskey barrel, or rain barrel ($0-50, depending on whether new or reclaimed)
- Solar panel 2-5W ($15-30)
- Submersible pump 12V, 300-500 GPH ($25-40)
- Vinyl tubing to match pump outlet (~$5)
- Small spillway reservoir bowl or DIY clay/resin catchment (~$0-20)
- Waterproof sealant and filler rocks (~$10)
Total cost: $55-155
Spillway Construction: A spillway catches water from the pump outlet and directs it over the container edge. Options include:
- Purchase a pre-made spillway insert (ceramic or resin, $20-40).
- Use a small clay bowl inverted over the pump outlet, allowing water to spill over the rim.
- Mold a custom catchment from two-part epoxy resin or clay, allowing water to cascade over shaped lips.
- Create a simple metal or bamboo tube directing flow over the container edge.
Assembly:
- If using a new container, ensure it holds water without leaking. Older terra cotta pots may need waterproof sealant inside.
- Fill the container with water 3/4 full.
- Submerge the pump, positioning it to one side of the container bottom.
- Attach vinyl tubing to the pump outlet and route it upward to your chosen spillway location (rim center, side, or interior post).
- Install the spillway, securing it with waterproof adhesive or by suspending it from a bamboo stake anchored to the container rim.
- Arrange pebbles or river rocks around the pump intake and inside the basin, preventing sediment from clogging the pump filter.
- Position the solar panel 6-10 feet away (run the power cord through grass or along a garden bed) where it receives full southern exposure.
- Activate the pump by turning the panel toward the sun; water will circulate within seconds.
Performance: A 3W panel and 500 GPH pump create a lively cascading water feature visible from 20+ feet away. The focal point becomes the spillway—a ceramic bowl, decorative ceramic vessel, or handcrafted sculpture that catches and overflows water elegantly.
Multi-Tier Garden Fountain with Recirculating Design
For large garden spaces, a multi-tier fountain using stacked planters or a custom concrete structure creates an impressive water feature.
Materials:
- Four tiered ceramic or terracotta planters, each smaller than the one below (e.g., 12", 10", 8", 6" diameter) ($50-100)
- 4-6W solar panel ($25-40)
- 12V submersible pump, 400-600 GPH ($30-50)
- ½-inch vinyl tubing, 20 feet ($8-12)
- Waterproof construction adhesive ($8-10)
- Stainless steel or copper riser pipe to center the tiers (optional, $20-40)
- Landscape fabric and pebbles ($10-15)
Total cost: $151-267
Assembly:
- Stack the tiered planters, largest at bottom, centering them for visual appeal. Dry-stack without adhesive first to plan the layout.
- Once aligned, apply waterproof construction adhesive between tiers and allow to set per manufacturer instructions (typically 24 hours).
- Drill a ½-inch hole through the bottom of the largest planter to route the power cord and vinyl tubing downward.
- Submerge the pump in the bottom (largest) tier with rocks anchoring it.
- Route vinyl tubing up through the center of the stack, securing it with small fasteners every 12 inches.
- At the top tier, position the vinyl tubing outlet centered above the planter rim so water cascades over the edge to the tier below.
- Fill the bottom tier with water until it overflows the second tier. Water cascades through each tier, returning to the bottom where the pump recirculates it.
- Position the solar panel in full sun, 8-15 feet away, ground-mounted or pole-mounted at 45°.
- Decorate with aquatic plants, water lilies, or floating flowers for visual interest.
Performance: A 4-5W panel with a 500 GPH pump creates impressive water cascades visible through a full garden. The tiered design accommodates small aquatic plants or floating flowers, transforming the fountain into a water garden centerpiece.
Selecting Pump Size and Panel Wattage
Pump flow rate selection: Measured in gallons per hour (GPH), pump size determines water effect intensity.
- 50-150 GPH: Gentle, quiet circulation, suitable for birdbaths and tabletop fountains. Water trickles, doesn’t spray.
- 200-400 GPH: Moderate flow, visible cascades, suitable for single-tier or tiered fountains. Audible water sound but not loud.
- 500-800 GPH: Strong flow, impressive sprays and waterfalls, suitable for large multi-tier fountains or pool features. Noticeable sound, water consumption increases.
Solar panel matching: Panel wattage must exceed pump power consumption.
- 50-150 GPH pumps: 1-2W panel sufficient. Operates in partly cloudy conditions.
- 200-400 GPH pumps: 2-3W panel recommended. Moderate cloud tolerance.
- 500-800 GPH pumps: 4-6W panel required. Best in full sun; cloud-dependent.
Undersizing the panel reduces performance on cloudy days; the pump slows or stops. Oversizing the panel improves reliability but costs more ($5-10 per watt extra). Most DIY fountains use 2-4W panels ($20-40) matching 200-400 GPH pumps ($25-40).
Seasonal Maintenance and Winter Care
Summer operation: Monitor water level daily, especially in hot, dry climates; evaporation can lower the basin by 1-2 inches weekly. Top up with a garden hose every 3-5 days. In dusty regions, monthly cleaning of the solar panel with plain water restores efficiency.
Fall preparation: As daylight hours decrease, fountain flow will naturally slow. This is normal. Clean leaves from the basin; remove fallen debris before it reaches the pump filter. In early autumn, inspect the pump for algae or sediment buildup; if flow diminishes, run clear water through the system for 30 minutes.
Winter shutdown (cold climates): In regions where temperatures drop below 32°F, drain the system entirely to prevent ice expansion damage. Turn off the pump, empty the basin, and store the solar panel and pump indoors. Store the pump with damp cloth to prevent seal drying; lightly oil pump bearings before spring restart.
Spring restart: Inspect all components for winter damage. Test the pump at low voltage before installing in the fountain. Refill the basin with fresh water and activate the pump. The first week may produce turbid water as sediment clears; allow the system to run until water clears, then adjust water level to optimal height.
Preventing Algae and Mosquito Breeding
Stagnant water breeds mosquitoes and grows algae, but circulating water prevents both issues. Continuous daytime circulation during warm months eliminates mosquito breeding habitats. If the fountain sits idle on cloudy days, empty the basin weekly or treat with a mosquito dunk (biological Bti larvicide, $5-10).
Algae growth in clear basins is cosmetic but harmless. To prevent green water, cover the basin with shade cloth (30-50% light reduction), add an ultraviolet (UV) sterilizer module ($30-60 for larger fountains), or simply drain and refill the basin monthly. In small tabletop fountains, emptying and refilling takes 5 minutes and eliminates algae concerns.
Water Conservation and Overflow Prevention
Circulating fountains consume minimal water; most losses are evaporation rather than leakage. In sunny, arid climates, expect 1-2 gallons of daily evaporative loss from a large fountain basin. In humid climates, losses may drop to 0.5 gallons daily.
To prevent basin overflow during heavy rain, install a simple float valve (commonly used in livestock water tanks, $10-20) that shuts the pump inlet when the basin reaches maximum level. Alternatively, drill a drain hole near the basin rim and direct overflow to a nearby garden bed, recycling the water as irrigation.
Troubleshooting Common Problems
Pump runs but little or no water flows: Clogged intake filter or tubing kinks. Shut off the pump, disconnect the inlet tubing, and rinse under fresh water. Check tubing for kinks or air bubbles; straighten any bends and purge air by briefly turning on the pump upside-down.
Fountain is very quiet or has no water flow on cloudy days: Normal behavior; the pump slows as panel voltage drops in dim light. Add a battery module (capacitor-based, $20-40) to store energy from morning sun for afternoon use, extending fountain operation into light-cloud periods.
Solar panel produces no power: Check for dirt, bird droppings, or dust; clean with a soft, damp cloth. Inspect connectors for corrosion or loose fitting; oxidation reduces conductivity. Test the panel in direct sun; if multimeter shows zero output, the internal diode may be faulty (time for a replacement panel, $15-30).
Water leaks from basin seams: Older terra cotta develops micro-cracks. Empty the basin, allow it to dry completely (2-3 days), apply waterproof silicone sealant inside all seams, and allow to cure per manufacturer instructions (typically 48 hours) before refilling.
Summing Up
DIY solar water fountains bring natural beauty and soothing sound to gardens and patios with minimal cost and zero ongoing electricity consumption. Designs range from simple floating-panel fountains (30 minutes assembly) to elaborate multi-tier systems (afternoon project). Material costs of $30-160 deliver lifespans of 5-10 years, with annual maintenance limited to seasonal filling and occasional cleaning.
Choosing the right pump and panel ensures reliable operation. Most homeowners succeed with 2-3W solar panels ($20-30) paired with 200-400 GPH pumps ($25-40), providing excellent cost-to-performance ratio. Larger systems require proportionally larger investments but deliver more impressive water features.
For homeowners interested in larger-scale water features or integrating fountains with full landscape solar lighting systems, professional design consultation is available. To discuss solar-powered landscape lighting, water features, or whole-home solar solutions, call (855) 427-0058 for a free design consultation with solar specialists who can customize recommendations for your property.
Updated