
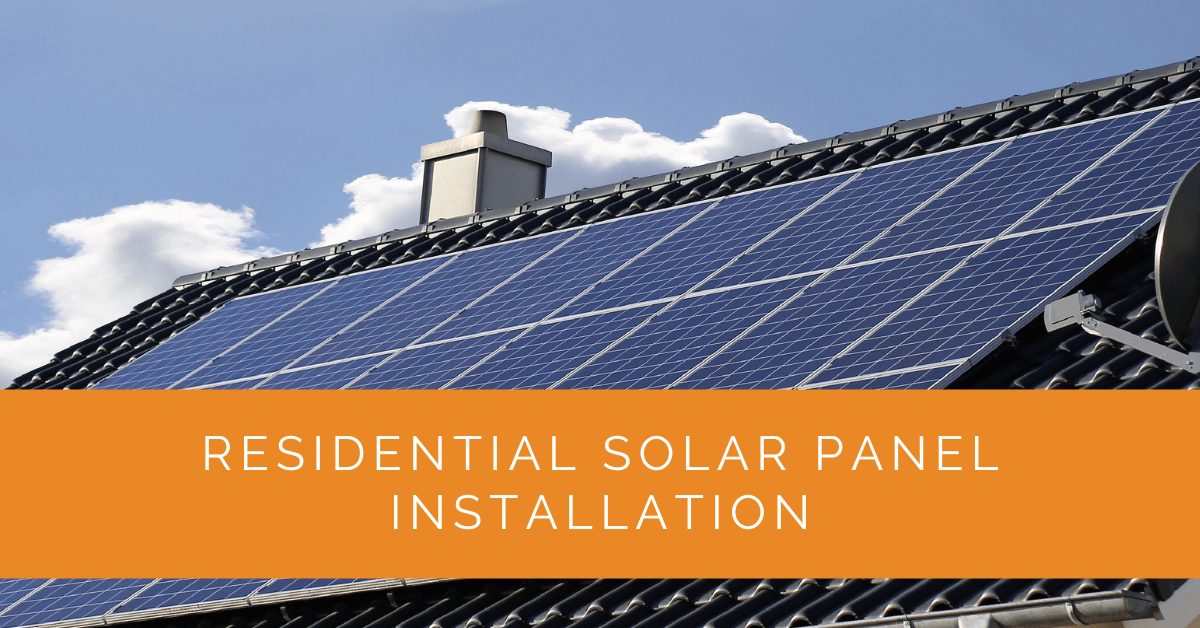
Installing solar panels on your home is one of the most significant energy upgrades you can make — and in 2026, the process is more streamlined than ever. The physical installation typically takes just one to three days, but the full timeline from first consultation to Permission to Operate runs 2–5 months, mostly driven by permitting and utility paperwork. Understanding each stage helps you avoid surprises, ask the right questions, and choose an installer who can deliver.
This guide walks through the complete residential solar installation process, from the pre-installation checks that determine whether your home is a good candidate all the way through to system activation and monitoring. If you’d prefer to speak with a qualified installer right away, call (855) 427-0058 for a free quote — or read on to understand exactly what the process involves.
Before You Install: What to Know First
The decisions you make before signing a solar contract are just as important as the installation itself. Rushing through the pre-installation phase is the single biggest mistake homeowners make — and it leads to undersized systems, surprise costs, and regret.
Check Your Roof’s Suitability
Your roof is the foundation of your solar system. Before going any further, assess it honestly against these criteria:
Age and condition: Solar panels have a 25–30 year lifespan. If your roof has fewer than 10–12 years of life remaining, replace it before installing panels — removing and reinstalling a solar array costs $1,500–$6,000. Most installers will flag a roof that needs replacement and either decline to install or include a roof assessment in their quote.
Orientation and pitch: South-facing roofs at a 30–45° pitch produce the most energy in the US. East and west-facing roofs still work well — typically at 10–20% lower output. North-facing panels are generally not viable for a primary array. Flat roofs can work with tilted mounting systems.
Shading: Trees, chimneys, dormers, and neighboring buildings all reduce solar output. Shade falling on even a single panel can significantly impact the output of an entire string. Your installer will map shade using satellite tools or an on-site shade analysis. If shading is heavy, consider microinverters or DC power optimizers that mitigate the impact of partial shade.
Structural load: Solar panels add approximately 3–5 lbs per square foot to your roof. Most residential roofs handle this without issue, but older or non-standard roof structures may need an engineering assessment. Your installer will confirm this during the site visit.
Electrical panel capacity: Most modern homes have 200-amp electrical panels, which can accommodate a standard residential solar system. Homes with older 100-amp panels often need a panel upgrade ($1,500–$3,000) before solar can be connected. Your installer will evaluate this during the engineering visit.
Understand Your Energy Usage
Your solar system should be sized to offset your actual electricity consumption — not your neighbor’s, not a national average. Pull 12 months of electricity bills and calculate your average monthly usage in kilowatt-hours (kWh). This is the number your installer uses to size your system.
The US average household uses around 880 kWh/month, but actual usage varies enormously. If you’re planning to add an EV, switch from gas to a heat pump, or add a hot tub, factor those loads into your sizing conversation with your installer. It’s far cheaper to size correctly from the start than to add panels later.
Know the Incentives Available in 2026
The federal solar incentive landscape changed significantly in 2026. The residential solar tax credit — known as the Section 25D Investment Tax Credit (ITC) — expired on December 31, 2025. Homeowners who purchase and own their solar system outright are no longer eligible for the 30% federal credit.
However, several paths still offer meaningful financial relief:
Leases and PPAs: If you lease your solar panels or enter a power purchase agreement (PPA), the installation company — not you — owns the system. That company can still claim the Section 48E commercial tax credit, which remains active through 2027. A good lease or PPA provider should pass those savings on to you through lower monthly rates.
State and utility incentives: Many states still offer solar tax credits, rebates, and property-tax exemptions that can meaningfully reduce your cost. California, Massachusetts, New York, Illinois, and several other states have active programs. Check the Database of State Incentives for Renewables & Efficiency (DSIRE) at dsireusa.org for what’s available in your state.
Net metering: If your utility offers net metering, you’ll receive bill credits for any excess electricity your system sends to the grid. The value of net metering varies by state — some credit you at the full retail rate, others at a lower “avoided cost” rate. This directly affects your payback period, so confirm your utility’s current net metering policy before signing a contract.
Decide How to Pay for Solar
How you finance solar affects both your upfront cost and your long-term savings:
Cash purchase: Highest long-term savings since you own the system outright and pay no interest. Payback periods in 2026 typically run 9–13 years without a federal credit, depending on your state incentives, utility rates, and system size. After payback, 15+ years of near-free electricity follow.
Solar loan: You own the system, benefit from state incentives, and can spread payments over 10–25 years. Your monthly loan payment is often offset by your reduced electric bill from day one. Look carefully at dealer fees — some loans from solar installers carry 20–30% dealer fees that inflate the effective interest rate significantly.
Lease or PPA: No upfront cost, lower savings over time. You pay the solar company a monthly fee (lease) or a per-kWh rate (PPA) rather than owning the system. The main advantages are zero maintenance responsibility and access to Section 48E savings passed through by the installer. The downside: you don’t own the system, which can complicate home sales and means you get less of the long-term financial benefit.

How to Choose a Qualified Solar Installer
The quality of your installer determines the quality of your system — and your experience for the next 25 years. Here’s how to vet candidates properly:
NABCEP certification: The North American Board of Certified Energy Practitioners (NABCEP) is the gold standard for solar installer credentials. Look for NABCEP-certified photovoltaic installation professionals or companies with NABCEP-accredited PV installation professionals on staff.
License and insurance: Your installer must hold a valid electrical contractor’s license in your state and carry general liability insurance and workers’ compensation. Ask for certificates of insurance before signing anything.
Local track record: An installer who has done dozens of installations in your county will know your local permitting office, your utility’s interconnection process, and any quirks of local codes. This knowledge alone can shave weeks off your timeline.
Multiple quotes: Get at least three quotes. Compare them on price per watt (not just total price), equipment specifications, production estimates, warranty terms, and timeline. Be wary of quotes that come in significantly lower than others — they often reflect cheaper equipment or corners cut on installation.
References and reviews: Ask for references from homeowners whose systems have been operational for at least two years. Check Google reviews, the Better Business Bureau, and solar-specific review platforms. Pay attention to how the company handles problems — not just glowing first-year reviews.
Contract clarity: A legitimate solar contract clearly specifies system size, panel and inverter brands and models, production guarantees, warranties, payment schedule, and what happens if production falls short. Walk away from any installer who won’t provide specifics on equipment or who pressures you to sign on the spot.
Ready to get quotes from vetted local installers? Call (855) 427-0058 or request a free solar assessment online.
The 7-Step Residential Solar Installation Process
Once you’ve chosen an installer and signed a contract, here’s exactly what happens:
Step 1: Engineering Site Visit (Weeks 1–2)
After you sign your contract, an engineer visits your property to confirm that your home can support the planned installation. This is distinct from the pre-sale site visit your installer likely already conducted — the engineer is there to formally verify the installer’s design is safe and structurally sound.
During the engineering visit, the engineer will assess your roof’s structural integrity, confirm the planned racking attachment points hit rafters properly, check that your electrical panel can accommodate the solar interconnection, and document everything needed for the permit application. Some installers combine the engineering visit with the pre-sale site visit; others send the engineer only after contract signing.
Many installers now offer virtual site visits using satellite imagery and high-resolution photos, which can reduce the site visit from a week or more of scheduling to a few days. Ask about this option — it’s legitimate and commonly used for standard residential installations.
Step 2: Permits & Documentation (Weeks 2–6)
Your installer handles the permit applications, but understanding what’s being filed helps you track progress and ask informed questions.
| Document | Filed With | Typical Timeline |
|---|---|---|
| Building permit | Local building department | 1–4 weeks |
| Electrical permit | Local building department | Often included with building permit |
| Utility interconnection application | Your electric utility | 2–6 weeks |
| HOA architectural review | Your HOA (if applicable) | 2–4 weeks |
| State incentive applications | State energy office or utility | Varies by state |
Permitting timelines vary significantly by jurisdiction. Some cities and counties use SolarAPP+ (Solar Automated Permit Processing), a software tool that can approve permits in hours for standard residential systems. Others have manual review processes that take 3–4 weeks. Your installer’s familiarity with your local permitting office is a major factor in how quickly this step moves.
If your system is approved through SolarAPP+, you may be able to begin installation within days of filing. Traditional permit review adds 2–4 weeks.
Step 3: Equipment Procurement (Weeks 2–6, parallel with permits)
While permits are being processed, your installer orders your equipment. A standard residential solar system includes:
Solar panels (16–32 for a typical system): Modern residential panels produce 400–450 watts each. Leading manufacturers in 2026 include Qcells, Canadian Solar, Silfab, REC, and Panasonic. Panel efficiency ratings for quality residential panels run 20–23%. Most come with 25-year product and performance warranties.
Inverter(s): Converts DC power from your panels into AC power for your home. The main options are string inverters (one central unit for the whole array, lowest cost), microinverters (one per panel, best for shaded or complex roofs, highest cost), and string inverters with DC power optimizers (middle ground — Enphase IQ8, SolarEdge HD-Wave).
Racking and mounting hardware: Aluminum rails that attach to your roof rafters, with panel clamps on top. Flashing is installed at each rafter penetration point to prevent leaks. Ground mounts use concrete piers or ground screws rather than roof penetrations.
Monitoring system: Usually built into the inverter, allows you to track production in real time via a phone app. Most inverter brands (Enphase, SolarEdge, SMA) offer monitoring dashboards that show daily, monthly, and lifetime production.
Battery storage (optional): A home battery (Tesla Powerwall 3, Enphase IQ Battery, Franklin Electric WH) stores excess solar production for evening use and provides backup power during outages. Adds $10,000–$18,000 to the total cost but significantly increases your energy independence.
Equipment lead times vary. Popular panels and inverters are usually available within 1–2 weeks. Less common brands or configurations may take 3–4 weeks. Confirm equipment availability with your installer before signing your contract.
Step 4: Installation Day (1–3 Days)
The physical installation is typically the fastest part of the entire process. A crew of 3–4 installers can complete a standard 8kW residential system in one to two days. Complex roofs with multiple pitches, skylights, or heavy shading workarounds may take three days.
Here’s what happens on installation day, in sequence:
1. Racking installation: The crew marks rafter locations through the roof surface, drills lag bolts into each rafter, and installs the aluminum mounting rails. Flashing — aluminum or rubber waterproof barriers — is installed at each penetration to prevent water infiltration. This is the most structurally critical part of the installation; improper flashing is the leading cause of solar-related roof leaks.
2. Electrical conduit and wiring: Conduit runs are installed from the array location down through the attic (or along the exterior) to the inverter location, usually near your main electrical panel. Junction boxes are installed on the roof to manage wiring from multiple panel strings.
3. Panel mounting: Panels are carried onto the roof and clamped to the racking rails. Each panel weighs 40–50 lbs. Panels are connected using weatherproof MC4 connectors into series strings that feed the inverter. Installers test each string with a multimeter before the inverter is connected.
4. Inverter installation: The inverter (or microinverters, if used) is mounted and connected to the panel strings and to the home’s electrical system. For string inverters, this is typically a wall-mounted unit in the garage or utility room.
5. Main panel connection: A dedicated solar circuit breaker is added to your main electrical panel. This is where your solar system feeds power into your home’s electrical system. The installer may also install a production meter at this point to track your solar output separately from your consumption.
6. Monitoring setup: The monitoring device is connected to your WiFi network and configured. You’ll receive login credentials for your installer’s monitoring platform and, in most cases, the inverter manufacturer’s own app.

Step 5: City/County Inspection (1–2 Weeks After Installation)
Before your system can be turned on, a city or county building inspector must verify that the installation meets local electrical codes and structural requirements. Your installer schedules this inspection and should be present when the inspector arrives.
The inspector will check that panels are mounted securely to rafters, flashing is properly installed, wiring is run in conduit where required, the inverter and panel connections meet NEC requirements, rapid shutdown is installed correctly (NEC 690.12 requires a rapid shutdown system for rooftop arrays that allows first responders to de-energize the array), and grounding is correct.
If the inspector flags any issues, your installer is responsible for correcting them and scheduling a reinspection. This is uncommon with experienced installers but can add a week or more to the timeline.
Step 6: Utility Interconnection (1–4 Weeks After City Inspection)
Once the city inspection passes, your installer submits the inspection approval to your electric utility and requests final interconnection approval. The utility reviews the submitted electrical diagrams against your system’s approved interconnection application, and schedules installation of a bidirectional meter (or reprograms your existing smart meter) to track both your consumption from the grid and your exports to it.
When the utility grants Permission to Operate (PTO), you’re cleared to activate your system. This is the milestone that determines when your net metering billing begins.
Utility interconnection timelines vary widely. In progressive states with streamlined processes, PTO can come within a week of the city inspection. In states with slower utility processes, this step alone can take 4–6 weeks. Your installer should be actively following up with the utility during this period.
Step 7: System Activation & Monitoring
With PTO in hand, your installer activates the system. In most cases, this involves switching the inverter on — a process that takes minutes. Your installer should walk you through the monitoring app, confirm that the system is producing at expected levels, and provide documentation including your system layout, equipment warranties, and interconnection agreement.
From activation, plan to check your monitoring dashboard weekly for the first month to confirm production is close to your installer’s estimates. Most modern inverter monitoring systems alert you automatically if production drops unexpectedly. If you notice a significant gap between actual and projected production in the first few months, contact your installer — early detection of a wiring issue or equipment fault is much easier to address than a problem discovered a year later.
How Much Does Residential Solar Installation Cost in 2026?
Without the federal Section 25D residential tax credit — which expired December 31, 2025 — residential solar costs more out of pocket than in prior years. The national average is $2.50–$3.50 per watt installed, all-in (panels, inverter, racking, labor, permits, and interconnection). Battery storage is additional.
| System Size | Est. Panels | Cost Range (2026) | Annual Production (avg US) |
|---|---|---|---|
| 5 kW | 12–13 | $12,500–$17,500 | 6,000–7,500 kWh |
| 6 kW | 14–15 | $15,000–$21,000 | 7,200–9,000 kWh |
| 8 kW | 18–20 | $20,000–$28,000 | 9,600–12,000 kWh |
| 10 kW | 23–25 | $25,000–$35,000 | 12,000–15,000 kWh |
| 12 kW | 27–30 | $30,000–$42,000 | 14,400–18,000 kWh |
Regional cost variation is significant. States with higher labor costs (California, New York, Hawaii) typically see costs 10–25% above the national average. States with competitive solar markets and multiple established installers (Texas, Florida, Arizona) tend to come in at or below the national average.
Battery storage adds $10,000–$18,000 per unit for a quality system. A single Tesla Powerwall 3 or Enphase IQ Battery 10T provides roughly 10–13.5 kWh of usable capacity — enough to power essential loads for 8–14 hours during an outage, or to shift your solar production for evening use under time-of-use rates.
Solar Incentives Available in 2026
The federal incentive picture changed at the end of 2025, but meaningful financial support is still available depending on your state and your financing approach.
Federal Incentives
The Section 25D residential solar tax credit (the 30% homeowner credit that was in place under the Inflation Reduction Act) expired December 31, 2025. Homeowners who purchase and own their solar systems placed in service on or after January 1, 2026 are not eligible for this credit.
The Section 48E investment tax credit — which applies to commercial solar and storage installations — remains active through 2027. This credit applies to installers who offer solar leases and power purchase agreements (PPAs). If a solar company owns your system, they can claim the 48E credit and should pass those savings to you through lower lease rates or PPA pricing. If you’re comparing a loan/cash purchase against a lease/PPA, factor in this difference.
State Incentives
Many states have maintained or expanded their own solar incentive programs independent of federal policy. Examples as of 2026 include:
Tax credits: New York (25% credit up to $5,000), Massachusetts (15% credit up to $1,000), South Carolina (25%), and others. State credits are in addition to any federal incentives and vary by income, system size, and year.
Rebates and cash incentives: Many utilities offer cash rebates on solar installations. These range from a few hundred dollars to several thousand depending on the utility and current program funding levels. Programs are often first-come, first-served and may have waitlists.
Property tax exemptions: Most states (35+) exempt the added value of solar panels from your property tax assessment. This means you won’t pay higher property taxes on the increased home value solar provides.
Sales tax exemptions: Some states exempt solar equipment from state sales tax.
Check dsireusa.org for a current, comprehensive list of incentives available in your specific state and utility territory. Your installer should also be familiar with local programs — confirming this during the quote process is a good vetting criterion.
Net Metering
Net metering is how most residential solar owners receive credit for excess electricity they export to the grid. When your panels produce more than your home consumes, the excess flows to the grid and your utility meter runs backward (or records an export). At billing time, exports offset your consumption charges.
Net metering policies vary significantly by state. California’s NEM 3.0, implemented in 2023, reduced export credit rates substantially compared to prior policy and shifted the value of solar toward self-consumption and battery storage. States like Texas have no statewide net metering mandate, though many utilities offer voluntary buyback programs. States like Massachusetts, New Jersey, and New York maintain relatively strong net metering frameworks.
Confirm your utility’s current net metering rate before signing a solar contract — it directly determines your system’s payback period.

How Long Does Residential Solar Installation Take?
The physical installation day is the shortest part of the process. The timeline is dominated by permitting and utility interconnection:
| Stage | Typical Duration | What Affects Timeline |
|---|---|---|
| Pre-sale assessment & contract | 1–2 weeks | Installer availability, your decision timeline |
| Engineering site visit | 1–2 weeks | Installer’s scheduling |
| Permit approval | 1–4 weeks | Local jurisdiction (SolarAPP+ vs manual review) |
| Equipment procurement | 1–3 weeks | Equipment availability, supply chain |
| Physical installation | 1–3 days | System size, roof complexity |
| City/county inspection | 1–2 weeks | Inspector availability, any corrections needed |
| Utility interconnection (PTO) | 1–4 weeks | Utility workload, state regulatory environment |
| Total | 2–5 months |
To minimize your timeline: choose an installer with strong local permit relationships, respond quickly to all requests for documentation, and confirm equipment availability before signing your contract. In jurisdictions that use SolarAPP+ and have streamlined utility interconnection, the full process can be completed in 6–8 weeks. In slow jurisdictions, 4–5 months is common.
What to Expect After Your System Goes Live
Activation is just the beginning. Here’s what to watch in the first year:
First month: Verify your monitoring system is working and production is tracking reasonably close to your installer’s estimates. A well-configured system within its first 30 days should show no errors in the monitoring dashboard and produce within 10–15% of projected output (accounting for weather variation).
First utility bill: Your first post-solar utility bill may look confusing. You’ll still receive a bill (even if your balance is zero or a credit), and the line items may include a fixed delivery charge or interconnection fee that you can’t eliminate with solar — this is normal. Review how net metering credits appear on your bill and verify the math.
Annual monitoring: Good monitoring systems alert you automatically to production drops. Set a reminder to compare your actual annual production against your installer’s first-year estimate. Most installers guarantee production within 10% of their estimate; if you fall short, contact them. Panel degradation averages 0.3–0.7% per year, so a slight decline year-over-year is expected and normal.
System warranty claims: Equipment warranties (25 years for panels, 10–15 years for inverters) are manufacturer warranties, not installer warranties. Keep your equipment documentation including serial numbers. If a panel or inverter fails, contact the manufacturer directly for warranty service; your installer facilitates the process but is not typically the warranting party.
Frequently Asked Questions
Does the federal solar tax credit still apply in 2026?
No — not for homeowners who purchase and own their solar systems. The Section 25D residential solar tax credit expired December 31, 2025. Systems placed in service on or after January 1, 2026 are not eligible for the 30% federal credit. If you’re financing solar through a lease or PPA, the installation company can still claim the Section 48E commercial tax credit through 2027 and should pass those savings to you through lower rates. Many states also have their own solar incentives that remain active in 2026.
How long does residential solar installation take?
The physical installation takes 1–3 days. The full process — from signing a contract to receiving Permission to Operate — typically takes 2–5 months. The longest steps are permitting (1–4 weeks) and utility interconnection (1–4 weeks). Jurisdictions using SolarAPP+ for automated permit approval can compress the total timeline to 6–8 weeks.
How much does a residential solar system cost in 2026?
The national average is $2.50–$3.50 per watt installed. A typical 8kW system runs $20,000–$28,000. Costs vary by region, equipment choice, roof complexity, and installer. Without the federal tax credit, state incentives and strong net metering policies become more important in your financial analysis.
Do I need to replace my roof before installing solar panels?
If your roof has fewer than 10–12 years of life remaining, you should replace it first. Removing and reinstalling a solar array costs $1,500–$6,000 depending on system size. A reputable installer will assess your roof’s condition during the site visit and recommend replacement if necessary. Many solar installers partner with roofing contractors and can coordinate a combined project.
Can I install solar panels myself?
Technically possible, but not recommended for grid-tied systems. DIY installation of a grid-tied system requires an electrical contractor’s license in most states, exposes you to significant electrical and fall hazards, and may void equipment warranties. Permits are still required and the utility interconnection process still applies. The primary use case for legitimate DIY solar is small off-grid or cabin systems not connected to the utility grid. For a residential grid-tied system, hire a licensed professional.
What happens during a power outage if I have solar panels?
A standard grid-tied solar system automatically shuts off during a power outage. This is a safety requirement (NEC 690.12 rapid shutdown) that prevents your panels from back-feeding the grid while utility workers make repairs. To maintain power during outages, you need battery storage — either a DC-coupled battery integrated with your solar system or an AC-coupled battery retrofit. A 10–13.5 kWh battery can power essential loads for 8–14 hours depending on your consumption.
Will solar panels damage my roof?
A properly installed solar system should not damage your roof. Reputable installers use stainless steel lag bolts driven into rafters with rubber or aluminum flashing at each penetration point. Improper installation — particularly inadequate flashing or bolts that miss rafters — can cause leaks. This is why installer vetting matters: check that your installer uses quality racking hardware and has a documented flashing process. Most roofing manufacturers also require that solar be installed by a qualified contractor to maintain your roof warranty.
Summing Up
Residential solar installation in 2026 is a 2–5 month process from contract to activation, with most of that time spent waiting for permits and utility interconnection rather than actual construction work. The physical installation itself takes just 1–3 days. The federal residential tax credit is no longer available for homeowners who purchase their systems — a significant change that affects the financial math — but state incentives and net metering remain important tools, and leases and PPAs still carry Section 48E benefits through 2027.
Choosing a qualified installer, getting multiple quotes, and understanding your local net metering policy before you sign are the three most important decisions you’ll make. The technology itself is mature and reliable; the process is well-defined; and quality solar systems deliver on their promises for 25–30 years.
To speak with a local solar specialist and get a free installation quote, call (855) 427-0058 now, or submit your details online.
📞 CALL (855) 427-0058 FOR A FREE QUOTE
Updated