Installing a solar electric fence is an innovative and eco-friendly way to secure your property. This technology, harnessing the sun’s power, provides an efficient, cost-effective, and environmentally sustainable solution for perimeter protection. Whether you’re looking to safeguard your crops from animals or enhance the security around your home, a solar electric fence offers a reliable and self-sufficient option. This article delves into the intricacies of solar electric fences, exploring their components, how they function, and the straightforward steps to install one yourself. Join us as we guide you through leveraging solar energy to create a barrier that’s effective and aligns with the principles of green living.
Contents
Key Takeaways
- Solar power is becoming a prominent alternative energy source, and solar-powered equipment, including solar electric fences, is rising.
- A solar electric fence consists of components like solar panels, batteries, photovoltaic cells, energizers, and fence voltage alarms, which work together to create an electrified barrier for security.
- Installing a solar electric fence involves selecting the right type of fence, laying out the structure along the property’s perimeter, attaching wires to posts, installing a solar-powered charging unit, grounding the system, testing its functionality, and providing a cost-effective and environmentally friendly security solution.
What Are the Components of A Solar Electric Fence?
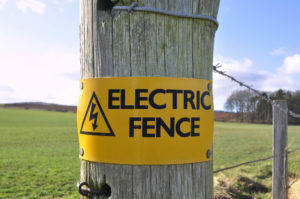
When you look at a solar electric fence, it might seem like a barbed wire fence due to multiple barbed wires with posts to hold them in position. These posts can be prepared out of wood, cement, or metal.
However, the primary difference is that these wires carry a high-voltage current. Anyone in contact with these wires is subjected to a light electric shock. The shock is achieved due to the various components in a solar electric fence working in sync. These include:
Solar Panel & Battery
The solar panel and the battery work interdependently to ensure the fence works as intended. The solar panel generates power by using solar energy to charge the battery. The battery, in turn, stores this power and supplies it to the fence energizer. The battery size depends on the consumption of the energizer used in the system.
Photovoltaic cells
These are a series of cells in the solar panel responsible for generating electricity through sunlight. PV systems produce enough voltage to power a 12 V battery and ensure that the battery remains charged.
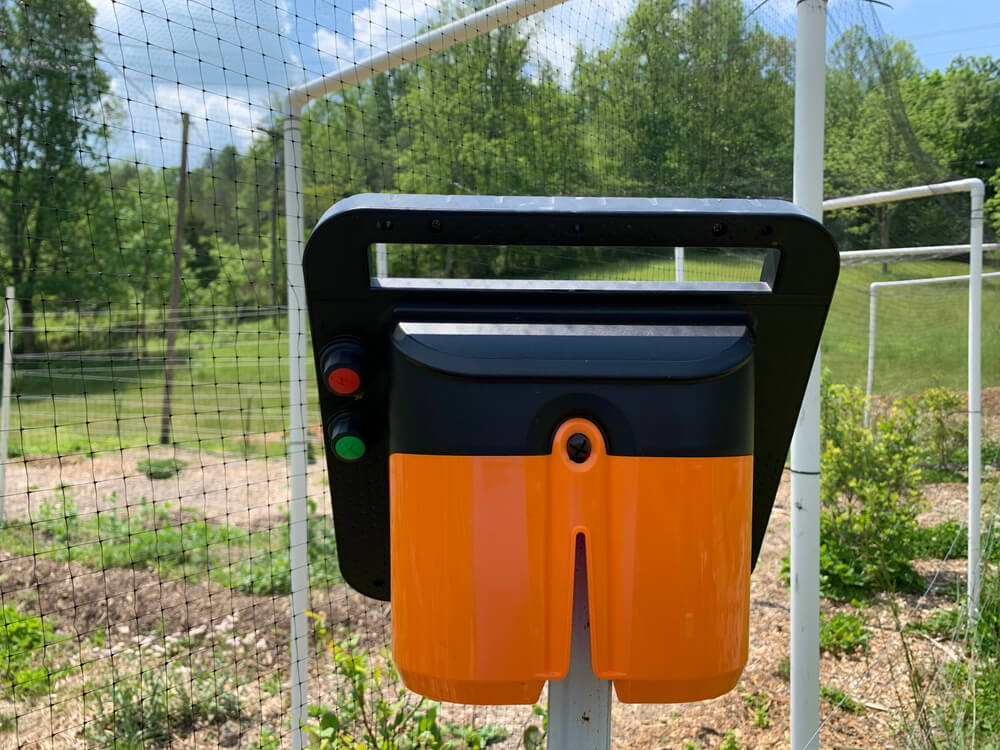
Energizer
The fence energizer is the component that transforms the low-voltage current supplied by the battery into a high-voltage current and sends it to the electric fence. With the energizer, the barbed wires have a constant electric current flowing through them to punish intruders.
Fence Voltage Alarm (FVA)
While the energizer is responsible for constantly supplying electricity to the fence, sometimes the voltage reaching the fence is lesser than the pre-set level. FVAs usually have a piezo buzzer that goes off once the voltage reaches a certain level. These alarms are valuable to monitor the effective voltage in your fence.
How Does a Solar Electric Fence Work?
The working principle of a solar electric fence involves trapping the sunlight by the photovoltaic cells in the solar panels. These cells power up the battery, which, in turn, supplies a low-voltage current to the energizer. Usually, the solar-powered battery can store up to 24 hours’ worth of energy, depending on the amount and duration of sunlight.
After getting powered by the battery, the energizer produces a sharp but brief voltage. These short-lived pulses pass through the barbed wires at the rate of 1 pulse every one to a half seconds. Each pulse lasts about three minutes, ensuring intruders are only subjected to a brief, non-life-threatening shock.
Not only do solar electric fences not make a difference to your electricity bill, but they are self-working mechanisms that require very little maintenance periodically. So, they are an excellent option and warrant use over traditional electric fences. The best part? They are clean energy sources that are easy to install. Let’s find out how.
Steps to Install a Solar Electric Fence
Usually, solar electric fences are installed using a power purchase agreement with a developer, where they have complete control over your solar panels. At the same time, you are only required to pay monthly bills. However, this is severely limiting and may not appeal to everyone. Due to this, individuals have started to install their solar fences.
It’s time to install your very own solar electric fence! Before you begin the installation process, mark the perimeter you would need your fence. After finalizing the circumference, here are the steps you can follow:
Decide on the type of solar electric fence
The market is ripe with solar electric fences available in multiple sizes and configurations. The choice of fence depends on the size of your area requiring protection. For example, a shorter fence with a low voltage current might suit you better if you have a small space with limited crops or flowers.
Not to mention, if you plan to install these structures to protect against animals that may harm your crops, it is essential to know about the animals in your area. Since each creature reacts to electric current differently, you might need high or low voltage depending on their tolerance.
Lay the structure along the circumference.
Since you have already decided on the perimeter, it’s time to start installing your outer structures. You can begin using a wooden or metal post at the extremes of the border, along which you can curve your electrical wiring. Next, you need to place T-posts between each corner so these wirings can line back up after the curve.
To install the corner posts:
- Dig down to approximately 2-3 feet and position them.
- Secure the hole firmly with the cement so the posts are affixed to the spot.
- Ensure all posts are on the same level and wait 24-48 hours for the cement to dry completely.
After the cement has dried, install the T-posts with an estimated distance of 15 feet between each. You can install them on any kind of surface, curved or flat. The only requirement is that these structures be installed about 2 feet underground.
Lay the Wires Along the Posts
Having fixed all the posts carefully, it is time to remove the barbed wires and unspool them as you hang the wires on posts of equal height around the circumference. You can install single or multiple wires in a parallel fashion, depending on the size of your space.
You can use one of two methods to fix the wires: U–pins to attach the wires to the poles or wrap the wire around the post. The latter will stay in place due to the tension of its connection to the next post.

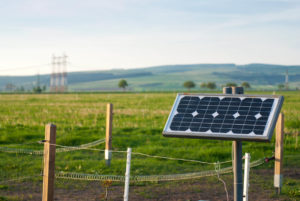
Install the Charging Unit
The solar-powered charging unit comes next, and you can install it by mounting it on one of the T-posts established. However, since this fence charger will require as much sunlight as possible, ensure that you place it in the southernmost location with ample sunlight. Additionally, avoid putting any obstacles that could cast a shadow around your charging unit and affect its voltage.
The installation method is similar to installing the posts. First, install a T post as specified above, ensuring it is in a sunlight-rich location. Mount your solar fence charger on top of it and make it face southward to get the promised performance from your solar electric fence.
Connect the Charger to the Ground
Every electrical system requires grounding to protect from high voltage risks. Sink earthing poles near the charging unit to ensure the current is directed to the ground. Since the number of poles differs according to the strength of the charger, it is a good idea to look at the accompanying manual before installing them.
After grounding, connect the positive and negative clips of the charger to the battery and then to the fence wires and grounding rod, respectively, while keeping the system off.
Leave your solar electric fence system for about 48 hours before using it so that it gets charged with the sunlight.
Test the System
Upon completion of the initial charge period, it’s time to test whether the fence works properly. Carefully turn on your system and use a voltage tester on the wires to check for the voltage produced. Make it a habit to regularly check for voltage and clear your fencing system of any debris accumulated after switching it off. If you are not planning for maintenance, you can keep it ‘ON’ constantly.
Post-installation, solar electric fences require minimal maintenance and are synonymous with low electricity costs in the long term. They are also sustainable options that save the overexertion of natural resources.
Expert Insights From Our Solar Panel Installers About Installing a Solar Electric Fence
Installing a solar electric fence is a great way to protect your property while promoting sustainability. The integration of solar technology ensures that your fence remains powered without adding to your electricity bill, making it a cost-effective solution in the long run.
Solar Energy Specialist
One of the key advantages of solar electric fences is their minimal maintenance requirement. Once installed, these systems are highly reliable and require very little upkeep, providing consistent security with the added benefit of renewable energy.
Renewable Energy Consultant
When setting up a solar electric fence, it’s crucial to ensure that the solar panels receive maximum sunlight. Positioning the panels correctly and avoiding any potential shadows will significantly enhance the efficiency and performance of your fence.
Solar Installation Expert
Final Thoughts
A solar electric fence is a flexible structure that you can install with barbed wire to keep animals off your property. Before investing in solar-powered electric fences, ensure they conform to national and international standards. You must also invest in the proper tools and accessories for installation and maintenance.
You can install several additional features with your fence to enhance security, prevent tampering, and increase fault detection. It also has stand-out features like longer service life, a durable shock system, and high performance.
Purchase your components now and install a solar electric fence for maximum security!
Frequently Asked Questions
How does a solar electric fence work?
A solar electric fence uses a solar-powered energizer to send short, high-voltage pulses along a wire fence line. When an animal or person contacts the wire, they complete a circuit to the ground, receiving a brief shock that is startling and memorable but not harmful. The solar panel charges a battery that powers the energizer continuously, making the system self-sustaining without any grid connection.
How many acres can a solar electric fence cover?
Coverage depends on the energizer’s output rating, which is measured in joules. A small 0.1 joule solar energizer covers up to 5 miles of fence line, suitable for a few acres. Mid-range units at 0.5 to 1 joule cover 10 to 25 miles of fence. Larger livestock operations need 2 joule or higher energizers covering 50+ miles. Always match the energizer’s rating to your actual fence length plus a safety margin for vegetation contact losses.
How much sunlight does a solar electric fence need?
Most solar fence energizers require 6 to 8 hours of direct sunlight per day to maintain a fully charged battery. The internal battery stores enough energy to run the fence for several cloudy days without sun. In very northern regions during winter, where daylight hours drop significantly, a larger solar panel or a backup battery with a higher capacity may be needed to keep the fence energized through extended overcast periods.
Is a solar electric fence safe for animals?
Yes. Properly installed electric fences deliver a short-duration pulse that causes a sharp shock but does not injure animals. The voltage is high but the current is extremely low and the pulse duration is measured in milliseconds. Animals learn quickly to avoid the fence after one or two contacts. Electric fencing is widely used in agriculture and is endorsed by veterinary and animal welfare organizations as a humane and effective containment method.
What wire should I use for a solar electric fence?
For livestock, high-tensile steel wire or polywire are the most common choices. Steel wire is more durable for permanent installations, while polywire is lighter and easier to move for rotational grazing setups. For predator control or smaller animals, fine stainless steel wire or electrified netting works well. Always use proper insulators at all fence posts to prevent the electrical charge from leaking to ground through the posts.
How do you ground a solar electric fence?
Grounding is critical. Drive three to four 6-foot ground rods at least 10 feet apart into moist soil, and connect them with ground wire to the energizer’s ground terminal. Poor grounding is the most common cause of a weak or ineffective fence. In dry or sandy soils where ground conductivity is low, use a ground-return fence design that runs a separate ground wire along the fence line instead of relying entirely on soil conductivity.
Summing Up
A solar electric fence is one of the most cost-effective and flexible ways to contain livestock or deter predators on any size property. No trenching, no electrician, no monthly electricity bill. Once you understand the basics of energizer sizing, proper grounding, and fence construction, installation is straightforward and the system largely looks after itself. The key is matching your energizer’s output to your fence length, investing in solid grounding, and keeping vegetation from shorting the line. Get those three things right and you’ll have a reliable barrier that works day and night, rain or shine, for years.
About the Author
Solar Panels Network USA stands at the forefront of solar energy solutions, driven by a team of seasoned solar engineers and energy consultants. With over decades of experience in delivering high-quality solar installations and maintenance, we are committed to promoting sustainable energy through customer-centric, tailored solutions. Our articles reflect this commitment, crafted collaboratively by experts to provide accurate, up-to-date insights into solar technology, ensuring our readers are well-informed and empowered in their solar energy decisions.
Updated