Are you a fan of living off the road and off-grid in your RV?
While that does allow a certain level of thrill and tranquility, not having access to electricity can become a significant problem in today’s world. After all, we all need our mini-fridge, lights, and electrical necessities such as mobiles, laptops, and temperature regulatory devices.
So, what do you do when you need electricity but still want to camp in your RV?
Simple! You install a solar panel and run your life on solar power. Not only will that help you build an independent life, but it will also considerably cut down on costs.
Whether you’re installing a solar panel on your own or are taking assistance from someone, you should know what the procedure looks like. Therefore, we have created this handy solar kit installation guide for your RV.
Contents
Pre-Installation Checklist
Installing a solar kit to your RV is exciting, but you cannot install an electricity source without knowing what size and capacity you will need, among other things. There are some precursors to installing a solar panel on your RV, and we shall discuss them in this section.
Calculating the Number of Panels Required
The number of panels you will need is directly dependent on your RV’s size and the solar power system size ideal for you. You need to measure the size you have on the roof. However, if you have aerials and roof vents you work with, you’ll have some extra calculations to do.
The number of panels also dictates the wattage you’ll get in the van. Most RV solar panels come between the 100 W to 400 W capacity. Therefore, for instance, if you need 800 W, you can use two 400 W panels.
Calculating the Power Needed
You have to measure the size of the RV and panels and the amount of power you will need. Not only that, but you will also have to calculate the duration for which you will get sunlight throughout the day so that you can check how much power each of your equipment takes and how much the panel can produce.
If you install 800 W of solar panels in a place where they can get 5 hours of sunlight each day, you can attain the total energy of 4,000 Wh each day. Let us put this into perspective and see how much the general electrical appliances need.
- A mini-fridge will generally be available for 300 W. Therefore, to run it the entire day, you will need 7200 Wh.
- You can run a 200 W TV for about three hours with just 600 Wh.
- You can have light with a 75 W bulb throughout the night with about 45 Wh.

Knowing Your Budget
We are assuming that since you live in an RV, you have a very strong opinion on budgeting and want to be on-point with it. The best thing about solar panels and remote RV electricity generation is that you have many options to work with.
The general cost of getting a 22” × 48” conventional monocrystalline panel capable of producing 100 W will cost you about $100 less than its back-contact competitors.
Draw a Wiring Diagram
Before you get to installing an RV solar panel, you need to know if you want permanent or portable panels and if you want to wire them parallelly or in a series. To get a clear idea of how you will go about the project, you suggest you make a wiring diagram so that you have something to come back to in the future.
Getting All the Components and Tools
You will need specific components and tools to make your solar panel installation as easy as possible. You could either invest in a pre-configured panel kit or can buy extra cables and batteries that you will need.
You will also require tools such as the basic handyman tools along with a multimeter. Here’s a couple of things you need to have:
- Solar panels
- Solar charge controllers – PWM or MPPT
- Solar panel installation guide
- Batteries
- MC4 connectors
- Solar panel mounting brackets
- Solar panel gland
- Solar panel cable
- Battery cut off switches
- Fuse holder
- Battery Terminal Eyes
- Heat shrink
- Solar panel kits
A Step-by-Step Guide to Install a Solar Kit on Your RV
By now, you know the kind of solar panel you want on your RV and the components you will need to do so. Therefore, let us look at how you can install the panel on top of your roof.
Step 1: Installing Solar Switches, Fuse Holders, and Batteries
The first step to installing a solar power kit is to prepare one. However, if you purchase a pre-equipped or deep cycle solar kit, you can skip this step.
This is one of the most crucial steps on the way because it determines how safe your entire apparatus will be. You need to secure the battery and double-check for any accidental alterations. You should also ground the battery for safety and efficiency.
Fit the fuse holders in the right positions so that they are towards the outside when you add fuses. This is because even though the system should be ready to commission, it shouldn’t be so ready that it occurs on its own by accident.
Finally, make sure that the battery cut-off switches along with the fuses are in the on position. Otherwise, what is the point of them even being present?

Step 2: Preparing the Solar Panels
The first thing you need to do is double-check if your solar panel size is ideal for your RV’s roof.
We stress checking things time and again at the early stages of installation because it is much better to catch faults early on. That will save you a lot of time, money, and effort.
It is better to prepare your solar panels on the ground because doing so on your RV’s roof can be potentially dangerous. Therefore, we encourage you to measure the panels on the ground and then measure the surface area available to you on the roof. This way, you would be entirely sure about whether or not it will fit on the roof.
You can make a cardboard cutting resembling the panels and place them on the roof to get a clearer idea of where the panels will lie.
Another thing you need to ensure is attaching the mounts where they lay flat on the RV’s rib.
Do not place the panels on the roof before testing them. Place each solar panel under direct sunlight connected to a multimeter to test the voltage on either end of each cable.
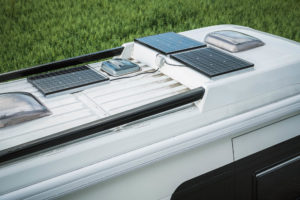
Step 3: Fitting the Panels on the RV’s Roof
Now that you have a good understanding of where the mounts are supposed to be and how you need to fix them in the right position, it’s showtime!
The first thing you need to do is attach the mounts on the roof and then bond them in the right position to fix the panels.
Drill the holes in the right place. Now, you should cover and seal the holes with a cable gland. Once you’re done, do not forget to take off the cable gland collars so that all the cables can fit separately.
Clean any debris on the edges of the holes and sand it to ensure that there are o rough edges. You can now prime and paint the roof to prevent corrosion.
The best time to conduct this step is on a dry day when you can leave all the seals and bonding for at least 24 hours before you start wiring.
Step 4: Wiring the Panels
Since you already have a wiring diagram, make sure that you use it to wire the panels perfectly. Most solar panels come with about a meter of both positive and negative cables with a fitted connector.
Ensure that you feed the cables perfectly into the drilled holes and keep them as short as possible to reduce voltage leakage. Keep all the extra wire you present by coiling under the solar panel.
You should not attach the cable to the cable glad collars. However, since doing so can be tricky, we suggest you connect them on the ground.
Make sure that all connections are tight and perfectly set according to your initial design.
Once you’re satisfied, thread the cable into the cable ground and secure all the cables tidily to the side of the roof with P-clips.
Step 5: Connecting the Solar Charge Controller
This is the time to consult the manufacturer’s instructions and wire the controller accordingly.
Generally, you will have to crimp the terminal eyes to the end of the solar cable and attach a battery temperature monitor to the main bank.
You should also add an extra fuse to get complete control over the wiring before you configure it according to your battery.
Once you’ve connected the controller, you’re pretty much done with the installation process. We suggest you catch your breath and give yourself a day before proceeding to the next step.

Step 6: Commissioning Your Setup
We asked you to wait because, more often than not, the first time you fire up a solar kit, it might not work. Therefore, you should have the time and energy left to fix the remaining issues.
All you need to do now is insert the fuse into the fuse holder and flip the cut-off switch to turn on battery input.
Suppose you do not see any sparks, flashes, and bangs, congratulations! Everything is in place! However, you will still need to wait for a while to check if your appliances are charging or functioning. If everything works, your job here is done. If not, you should either revisit your wiring or consult an electrician for some help.
Case Study: Efficient Installation of RV Solar Kits for Off-Grid Living
Background
At Solar Panels Network USA, we are dedicated to providing tailored solar solutions that cater to the unique needs of our clients. This case study showcases the efficient installation of an RV solar kit, highlighting the steps and considerations for achieving a reliable off-grid power system.
Project Overview
Our client, an avid traveler living a nomadic lifestyle in their RV, sought a sustainable and reliable power solution. The goal was to install a solar kit that could provide sufficient energy to power essential appliances such as a mini-fridge, lights, and electronic devices while off-grid.
Implementation
We began with a comprehensive assessment of the client’s energy needs and the available roof space on the RV. This assessment helped determine the optimal number of panels and components required for the installation.
Detailed Process
Step 1: Calculating Power Requirements
The client needed to power a mini-fridge, lights, and electronic devices. We calculated the total wattage required and determined that an 800W solar panel setup would be ideal, considering the expected daily sunlight hours.
Step 2: Selecting Solar Panels
Based on the power requirements, we recommended two 400W monocrystalline solar panels. These panels were chosen for their efficiency and durability, suitable for the client’s off-grid needs.
Step 3: Preparing and Measuring the Panels
Before installation, we measured the panels on the ground and created cardboard cutouts to simulate their placement on the RV roof. This step ensured accurate fitting and minimized the risk of errors during installation.
Step 4: Installing Solar Switches, Fuse Holders, and Batteries
We secured the battery and installed fuse holders and battery cut-off switches. This setup provided a safe and efficient power system, preventing accidental short circuits and ensuring easy maintenance.
Step 5: Fitting the Panels on the RV Roof
The solar panels were mounted on the RV roof using durable brackets and bonded in place. Holes were drilled for cable entry, and cable glands were used to seal the openings, preventing water ingress.
Step 6: Wiring the Panels
Following the wiring diagram, we connected the panels in a series-parallel configuration. This setup balanced the voltage and current, optimizing power output and efficiency. Cables were secured with P-clips to keep the installation tidy and secure.
Step 7: Connecting the Solar Charge Controller
An MPPT charge controller was installed to maximize power output and manage battery charging. We followed the manufacturer’s instructions to connect the controller to the panels and battery, ensuring all connections were secure.
Step 8: Commissioning the System
We inserted the fuse into the fuse holder and activated the battery cut-off switch. The system was tested by powering various appliances, and the client confirmed that all devices were functioning correctly.
Maintenance and Monitoring
A maintenance plan was established to ensure the system’s longevity and efficiency:
Regular Inspections: Scheduled inspections were conducted to check for any signs of wear or damage to the panels, cables, and connectors.
Performance Monitoring: The client was provided with a monitoring tool to track energy production and battery status.
Cleaning Procedures: Regular cleaning of the panels to ensure maximum sunlight absorption.
Results
The installed RV solar kit provided reliable power for the client’s off-grid needs, allowing them to enjoy their nomadic lifestyle without compromising on essential electrical appliances. The client reported high satisfaction with the system’s performance and ease of use.
Summary
This case study demonstrates the importance of careful planning and precise execution when installing RV solar kits. By accurately calculating power requirements, selecting the right components, and following a structured installation process, we provided the client with a reliable and sustainable power solution for their RV.
Expert Insights From Our Solar Panel Installers About Installing RV Solar Kits
Properly calculating the number of panels and the power required is essential for setting up an efficient RV solar kit. This ensures you have enough energy to power all your necessary appliances while on the road.
Senior Solar Installer
Preparing your solar panels on the ground before installation is a safety measure that I always recommend. It reduces the risk of accidents and ensures all components are correctly measured and fitted.
Lead Solar Technician
Connecting the solar charge controller according to the manufacturer’s instructions is crucial. It ensures optimal performance and prevents potential issues during the commissioning phase of your setup.
Solar System Engineer
Our Expertise in Solar Products
At Solar Panels Network USA, we are dedicated to offering you valuable insights and assistance regarding solar products. With our deep-rooted knowledge and expertise in the solar product sector, our specialists are ready to guide you in discovering the ideal solar product for your requirements. Whether you aim to enhance your outdoor areas, save energy, or embrace a greener lifestyle, we are well-prepared to provide support. Don’t hesitate to contact us with any questions or inquiries.
Summing Up
Once you have installed a solar kit on your RV, you will quickly realize how great a decision it is. After all, you will get to live among nature in your RV without harming nature with non-renewable energy consumption.
Installing a solar kit by yourself can be a tricky business, even if you are used to installing most things on your RV by yourself. Therefore, if you’re not sure you did everything correctly, we suggest you take professional help before connecting the components.
We hope you have a great time in your RV lifestyle!
About the Author
Solar Panels Network USA stands at the forefront of solar energy solutions, driven by a team of seasoned solar engineers and energy consultants. With over decades of experience in delivering high-quality solar installations and maintenance, we are committed to promoting sustainable energy through customer-centric, tailored solutions. Our articles reflect this commitment, crafted collaboratively by experts to provide accurate, up-to-date insights into solar technology, ensuring our readers are well-informed and empowered in their solar energy decisions.

