Solar lights are one of the best solutions for outdoor lighting. If you are blessed with a house that has a front yard or an exciting backyard, you probably are on the lookout for lighting solutions that are affordable and effective. You could install solar lights in your garden to save energy and amplify the amount of light in your garden at night.
When it comes to solar-powered lights, you need to be mindful of several things. Their positioning, brightness, and efficiency all depend on how you install them in a given space. Moreover, if you do not install these lights the right way, you will have difficulty making the most out of them.
All this does not mean that you need to call professional help to install these lights. If you know even a little bit about electrical fixtures and installation, you are good to go! A little guidance will help you set these lights up in absolutely no time.
So, continue reading to find out more about installing outdoor solar lights properly!
Contents
- 1 Key Takeaways
- 2 Things You Will Need
- 3 How to Install Solar-Powered Lights Outdoors
- 4 Tips to Efficiently Install Solar-Powered Lights Outdoors
- 4.1 Tip #1: Highlight the Best Features of your Garden
- 4.2 Tip #2: Find Spots that Receive the Most Amount of Direct Sunlight
- 4.3 Tip #3: Clean and Charge the Battery Lights Before you Install Them
- 4.4 Tip #4: Make Sure you Prepare the Ground in your Yard Hours Before Installing
- 4.5 Tip #5: Clear your Surroundings and the Path where Lights are Installed
- 4.6 Tip #6: Try Using Remote Solar Panels
- 5 Case Study: Effective Installation of Outdoor Solar Lighting
- 6 Expert Insights From Our Solar Panel Installers About Tips for Installing Outdoor Solar Lighting
- 7 Our Expertise in Solar Lights
- 8 To Conclude With
Key Takeaways
- Installing outdoor solar lights can save energy and enhance garden lighting, but proper installation is crucial for efficiency.
- Important steps include positioning the lights strategically for maximum sunlight exposure, preparing the ground adequately, and maintaining clean solar panels.
- Consider using high-quality solar lights with remote panels for flexibility in placement and improved performance.
Things You Will Need
Before you dive right into your toolbox and scavenge through the numerous cables and switches, make a checklist of all the tools you will be using. Installation of solar lights does not require a large number of complicated tools. A basic toolbox you use at home should suffice.
Here is a list of all the tools you will be using.
- Slotted Screwdrivers
- Power Drills
- Wire Strippers
- Tape Measures
- Utility Knives
- Stud Finders
- Shovels
- Drywall Cutting Tools
- Writing Utensils
- Electrician’s Cutting Pliers
- Probes & Test Leads
- Conduit Benders
- Levels
- Gas Edgers
Another thing that you will require is your selected solar light system. Make sure you have them ready to go before you start landscaping your garden or installing solar lights. Additionally, you could also use additional tools and materials like Boxes & Brackets, Outdoor Electrical Wires, Pathway Lights, Landscape Light Kits, Electrical Tapes, Wire Connectors & Wire Terminals, Light Switches, Toggle Light Switch Plates, Expansion Anchors, Electrical Outlets & Receptacles.
How to Install Solar-Powered Lights Outdoors
Before giving you tips, we would like to guide you through the process of actually installing these lights outdoors. Continue reading to find out how you can successfully install solar-powered lights outdoors when you want to illuminate your backyard!
Step One: Position the Lights
The first thing you need to do is find places to position the lights in your garden. You need to know where you want the lights to go before you set up the foundation. You could get assistance regarding this positioning and ask a landscaping specialist to help you locate a good enough spot for these lights and their solar panel so that it receives adequate sunlight during the early hours of the day.

Step Two: Install the Foundation/Stakes into the Soil
The next thing you need to do is learn more about the installation of the foundation in the soil or create a base for your solar lights. You can achieve this by digging into the soil or simply using a hammer to push the foundation or the stakes into the ground automatically. The solar-powered system you install needs to be positioned so that you reap maximum benefits from the unit.
Step Three: Install the Solar by Fixing it into the Foundation
Once you have got your foundation in place, you can go ahead and install the lights into these stakes. Make sure you gently install the electrical fixing and the light into the stake. Reckless installing could result in a reduced performance output, and you could also break them if you are not careful.
Step Four: Position the Solar Panel
The final and the most important step is installing the solar panel that will be powering your lights. You might think that you are good to go as long as you place the solar panel in the garden, where it receives direct sunlight. However, the placement of this solar panel dictates how efficient your lights are going to be.
When looking for a location to set up the lights, make sure you also keep these panels in mind. They need to be placed where they are in direct contact with the sun. This will automatically help charge your lights with the most efficiency.
Tips to Efficiently Install Solar-Powered Lights Outdoors
Installing solar-powered lights might seem like a walk in the park. However, if you are not strategic with the positioning of your solar light, you will notice that your setup does not perform as well as it is capable of performing.
Here are some of the most effective tips to help you install lights outdoors to brighten up your night!
Tip #1: Highlight the Best Features of your Garden
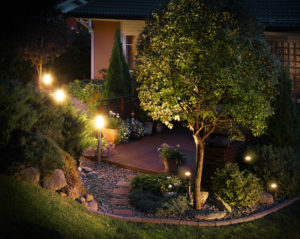
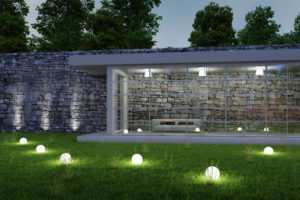
Outdoor solar lights are used to illuminate the best features of a garden. Before setting up your lights, you need to figure out what you want to illuminate using your outdoor solar lights. If you have a zen garden with exotic plants and stone figures, you can use your outdoor solar lights to project light on them.
You can also cover other parts of your garden or yard using these outdoor lights. For instance, if you like entertaining people by throwing elaborate pool parties, you can set your lights up by the pool for a better ambiance. Solar lights are generally water-resistant if designed for the outdoors, so a little water splash from the pool is unlikely to harm your lights as long as you make sure they are getting enough energy from the sun!
Tip #2: Find Spots that Receive the Most Amount of Direct Sunlight
When it comes to outdoor solar lights, you need to find places in your yard that do not have much shade, and the rays of the sun have enough access. These lights are exceptionally easy to install, but if you place the solar panel under a tree or a bush, it will affect the performance of your solar lights. You need to find places that receive direct sunlight for maximum efficiency and quick recharging of the battery so that your light gives out ample lighting at night.
Tip #3: Clean and Charge the Battery Lights Before you Install Them
You need to focus on the maintenance of your solar light set-up after installing these lights in the yard. These lights are solar-powered and derive their energy from the sunrays through the solar panel provided. However, if the solar panel is dirty or covered, you will notice that your solar lighting has stopped performing the way it did before.

Tip #4: Make Sure you Prepare the Ground in your Yard Hours Before Installing
Before starting, you need to prep the yard properly. When installing an outdoor light, you need to prepare the ground by watering it hours before the actual installation. This is because you cannot put the stake into the dry ground as it will not hold your solar lights sturdily.
On the other hand, the fixture will not stay in one place if the field is too soggy. The base needs to be adequately moist, and the best way to do that is to water your ground hours before. This way, the ground will hold just enough moisture, and your job of installing the solar lights will become significantly easier.
Tip #5: Clear your Surroundings and the Path where Lights are Installed
Make sure you clear any obstructions in the path where you plan on installing your outdoor solar light system. If you have many plants and statues that obstruct the path you plan to install the lights on, you need to make sure you remove them first before the installation of your panels. Another thing to pay heed to is removing all gardening equipment like lawnmowers from your path so that nothing stops the sun from providing energy and power to your lights!
Tip #6: Try Using Remote Solar Panels
It is advised that you opt for high-quality solar lights that come with remote panels. This way, you can place the panel a little away from the light itself and let it recharge more efficiently. Having this perk will give you a little more freedom to place the lights at any location on your property so they can provide you with a generous amount of light at night.
Remote solar panels can be placed away from the shade so that they are in direct contact with the sun’s rays. So, even if things obstruct your lights and cover them up with shade, the solar panel will be placed away from this location and continue providing energy.
You can invest a little more money into a good quality light and get numerous such benefits and services upon your purchase.
Case Study: Effective Installation of Outdoor Solar Lighting
Background
At Solar Panels Network USA, we pride ourselves on delivering top-notch solar lighting solutions tailored to the specific needs of our clients. Recently, we embarked on a project to install outdoor solar lights for a residential property. The homeowners desired a sustainable and efficient lighting solution to enhance their garden’s aesthetics and functionality.
Project Overview
The homeowners required a lighting system that was both energy-efficient and capable of providing ample illumination for their outdoor space. Our objective was to ensure optimal performance by strategically positioning the lights and solar panels to maximize sunlight exposure.
Implementation
Site Assessment and Design
Our first step was to conduct a thorough site assessment. We evaluated the garden layout, identifying areas with maximum sunlight exposure and considering the aesthetic aspects to highlight the garden’s best features.
Preparation and Tool Checklist
Before installation, we ensured all necessary tools were ready, including slotted screwdrivers, power drills, and wire strippers. Additionally, we advised the homeowners to moisten the ground hours before installation to facilitate easier placement of the stakes.
Positioning the Lights
We strategically positioned the lights in areas that would receive direct sunlight throughout the day. This step was crucial for ensuring the lights charged efficiently and provided consistent illumination at night. We paid particular attention to avoid shaded areas that could hinder solar panel performance.
Installing the Stakes
With the ground adequately prepared, we installed the stakes firmly into the soil. Proper installation of the foundation was essential to maintain the stability and performance of the lights. We used hammers to drive the stakes deep enough to ensure they were secure.
Fixing the Lights and Panels
Once the stakes were in place, we carefully installed the lights and connected them to their respective stakes. We then positioned the solar panels to ensure they were in direct contact with sunlight for most of the day. This placement was crucial for efficient energy absorption and storage.
Testing and Optimization
Post-installation, we conducted thorough testing to ensure all lights were functioning correctly. We monitored the system’s performance over several days, making necessary adjustments to optimize the lights’ efficiency and brightness.
Results
The new solar lighting system provided excellent illumination, enhancing the garden’s beauty and usability during the night. The strategic positioning of the lights and solar panels ensured they received adequate sunlight, resulting in optimal performance.
Performance
The lights performed consistently well, with the solar panels efficiently converting sunlight into energy. This ensured the garden was brightly lit throughout the night, meeting the homeowners’ expectations.
Energy Efficiency and Cost Savings
The homeowners experienced significant savings on their electricity bills, thanks to the energy efficiency of the solar lights. The use of high-quality solar panels and lights minimized maintenance costs and maximized durability.
Summary
This case study illustrates the importance of strategic planning and execution in installing outdoor solar lights. By focusing on optimal positioning, ground preparation, and quality components, we delivered a solution that enhanced the garden’s aesthetics and functionality. At Solar Panels Network USA, we continue to prioritize customer satisfaction and sustainable energy solutions in all our projects.
Expert Insights From Our Solar Panel Installers About Tips for Installing Outdoor Solar Lighting
Positioning solar lights to maximize sunlight exposure is crucial. I recommend placing the lights in spots that receive direct sunlight throughout the day to ensure optimal performance at night.
Senior Solar Technician
Proper preparation of the ground before installation is essential. Moistening the soil adequately ensures that the stakes hold firmly, providing stability to the solar lights.
Lead Installer
Using remote solar panels allows for more flexible placement of the lights. This way, you can position the lights where they are most needed while ensuring the panels receive maximum sunlight.
Solar Energy Consultant
Our Expertise in Solar Lights
At Solar Panels Network USA, we’re here to provide you with valuable information and support regarding solar lighting. With our experience and understanding of the solar lighting industry, our team of experts is prepared to assist you in finding the right lighting solution for your needs. Whether you’re interested in improving your outdoor spaces, conserving energy, or adopting a more sustainable approach, we’re well-equipped to help. Please feel free to contact us with any questions or inquiries.
To Conclude With
Installing solar lights around your property will add spice to your evenings and nights. These lights are low maintenance and have proven to be very cost-effective, so if you are looking to save some money, this is your sign to buy solar-powered lights for a greener and more energy-efficient future. Make sure to pay close attention to how you can install solar-powered lights outdoors and make the most of their features.
Additionally, if you are not satisfied with their performance, you can contact your provider company and seek professional assistance. Search for a light that works well with your aesthetic and compliments your property well before you make a purchase!
About the Author
Solar Panels Network USA stands at the forefront of solar energy solutions, driven by a team of seasoned solar engineers and energy consultants. With over decades of experience in delivering high-quality solar installations and maintenance, we are committed to promoting sustainable energy through customer-centric, tailored solutions. Our articles reflect this commitment, crafted collaboratively by experts to provide accurate, up-to-date insights into solar technology, ensuring our readers are well-informed and empowered in their solar energy decisions.

