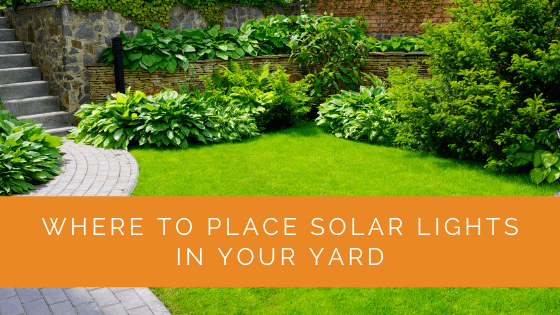
Where you place solar lights determines whether they’ll perform reliably all season or disappoint you with dim output and inconsistent operation. Many homeowners install solar lights, notice they don’t work well, and assume the lights are defective. Usually, the problem is placement. Understanding sun exposure, shadow patterns, and strategic positioning is the difference between solar lights that dazzle and ones that barely glow.
Solar lights depend entirely on sunlight. The solar panel’s position determines charging efficiency, which directly affects evening brightness and runtime. A light positioned perfectly charges differently from the same light placed just 10 feet away. Let’s explore the optimal placement strategies for different light types and yard conditions.
Key Takeaways
- Solar panels need 4-6 hours of direct, unobstructed sunlight daily for optimal performance
- South-facing placement provides the most consistent solar gain throughout the year
- Shade from trees, fences, or buildings can reduce battery charging by 50-80%
- Seasonal sun angle changes mean optimal placement varies between summer and winter
- Raised or elevated placement collects more sunlight than ground-level installation
- Reflective surfaces nearby (white walls, light-colored pavement) can boost charging
- Path lighting needs different positioning strategy than accent or security lighting
- Regular cleaning of solar panels maintains optimal charging year-round
Understanding Solar Panel Orientation Basics
The sun’s path across the sky varies by latitude and season. In the United States, the sun always crosses the southern sky at its highest point during the day. This is why south-facing placement is optimal for solar panels.
In summer, the sun rises in the northeast, crosses high overhead, and sets in the northwest. In winter, the sun rises in the southeast, crosses lower in the southern sky, and sets in the southwest. This seasonal variation means the optimal panel angle actually changes throughout the year, but positioning panels to face south catches the most sun regardless of the season.
Your latitude affects sun angles significantly. Someone in Florida experiences much higher sun angles at midday than someone in Minnesota. However, the basic principle remains consistent: south-facing placement is universally optimal across the United States.
If you’re in the Northern Hemisphere, south-facing is correct. If you somehow end up in the Southern Hemisphere, the principle flips: north-facing becomes optimal. But for anyone in the continental US, south-facing is always the right choice.
Identifying Shadow Patterns in Your Yard
Before installing solar lights, spend a day observing where shadows fall throughout daylight hours. This is the most important step. Shadows change dramatically from morning to evening and from summer to winter. A spot that’s sunny in June might be partially shaded in December when the sun angle is lower.
Walk your yard at 9 AM, noon, 3 PM, and 5 PM. Notice where the shadows from trees, buildings, fences, and other structures fall. For optimal results, your solar lights should be positioned where they receive direct sun during the peak charging hours of 10 AM to 4 PM.
Be particularly careful about overhanging branches, roof lines, and fence tops. Even partial shade from a thin branch can reduce charging efficiency by 20-30%. Thick shade from a building or dense tree foliage reduces charging by 50-80%. If a spot has shade for more than 2 hours during the 10 AM to 4 PM peak window, it’s not ideal for solar lights.
East or west-facing placements receive sun for only part of the day. An east-facing fence gets morning sun but afternoon shade. A west-facing location gets afternoon sun but misses morning hours. These aren’t terrible, but they’re suboptimal compared to south-facing placement where the sun is available for the longest duration.
Optimal Placement for Pathway Lights
Pathway lights serve a functional purpose: lighting your way along a walking route. This means they should be placed along the actual path rather than hidden or distant. However, you still want them positioned for good solar charging.
The best approach is positioning pathway lights on the south side of the path if possible. If your path runs east-west, lights on the southern edge of the path will face south and receive optimal sun. If your path runs north-south, place lights on both sides alternately, or position them where they face south even if this means placing them slightly off-center from the path.
Don’t hide pathway lights behind planting beds or in shadow areas to be inconspicuous. Yes, they’ll charge poorly there, but that defeats the purpose of having them. A solar light that barely glows because it’s shaded all day is worse than a solar light that’s slightly visible during the day but provides actual evening illumination.
Space pathway lights appropriately for your path width. For a 3-foot-wide path, single lights spaced 6-8 feet apart along the center work well. For wider patios, 4-5 feet apart is better. The goal is creating continuous gentle lighting that helps people navigate without creating a garish appearance.
Elevated placement works better than ground level. A pathway light sitting on the ground might be in the shade of nearby plants or garden features. Mounting the same light on a 2-foot shepherd’s hook or raised stake gets the solar panel above ground-level shade. More sun exposure means better charging and better evening performance.
Optimal Placement for Garden Bed and Accent Lights
Accent lights highlighting plants, garden features, or decorative areas can be more flexible with placement since they’re chosen for aesthetic impact rather than functional illumination. However, you still want them to work reliably.
Position accent lights near what they’re meant to illuminate, but not necessarily right next to it. A light positioned at the base of a plant often ends up in that plant’s shade as it grows. Better to position the light slightly away from the feature, aimed back at it. This placement keeps the solar panel in sunshine while the light illuminates your chosen feature.
For highlighting a statue or architectural element, position the light low and aimed upward at 45 degrees. This creates dramatic shadow and dimension. Make sure the solar panel faces south even if the light beam points a different direction.
Group accent lights strategically rather than scattering them randomly. Three well-placed lights in the same area create a more cohesive look than the same lights spread across your entire yard. Grouping also makes it easier to ensure all lights face south and get adequate sun.
Optimal Placement for Security Lights
Security solar lights highlight areas you want to monitor or deter intrusion. These lights are typically brighter than pathway lights and cover wider areas.
Position security lights near entrances, along property lines, or on the sides of structures. The goal is both visibility and deterrence. Even though you want functional security lighting, remember that the solar panel still needs sun.
If you’re mounting a light on the side of a building, orient it so the solar panel faces south. This might mean the light is mounted on the north side of the building with the panel facing the opposite direction, but that’s fine. The light beam and the solar panel face different directions in this setup.
Height matters for security lighting. Lights mounted 8-10 feet high cover much larger areas than ground-level lights. Higher placement also gets the solar panel away from ground-level shade. If mounting a security light high, ensure you have safe ladder access for cleaning the panel.
Combine solar security lights with motion sensors for efficiency. A motion-activated light only uses energy when needed, allowing a smaller solar panel to power a brighter light.
Placement by Yard Conditions
Heavily Shaded Yards
If your yard is mostly shaded by trees or nearby buildings, solar lights will always perform below their rated capacity. This isn’t ideal, but it’s manageable with strategic placement.
Choose the sunniest spots available, even if they’re not where you’d prefer the lights. A light in partial shade that actually works is better than one in ideal position that doesn’t. You may need to prune back branches to access more direct sun.
Consider removing solar lights from the shadiest areas entirely and concentrating them where you have sun access. Five well-placed lights in sunny spots will outperform ten lights scattered across shaded areas.
Upgrade to premium solar lights with larger panels if you’re in a shaded situation. Budget lights with small solar panels won’t charge adequately in partial shade. Premium models with oversized panels have better performance in suboptimal conditions.
Very Sunny Yards
Abundant sun is ideal, but even sunny yards have microclimates. South-facing walls, open patios, and unobstructed areas all receive different amounts of sun.
In very sunny climates, heat management becomes relevant. Some solar light circuits shut down or reduce output if they get too hot. This is a safety feature to prevent damage. Position lights where they get sun but not in areas that become extremely hot, like directly against dark-colored building surfaces.
Very sunny yards can support solar lights in almost any location. You have more flexibility than shaded situations. You can even place lights where they receive only 2-3 hours of direct sun and still get reasonable performance, simply because the overall solar intensity is higher.
Coastal or High-Altitude Yards
Coastal areas and high elevations receive particularly intense sunlight. Solar panels in these locations charge quickly and completely.
The downside is increased UV intensity, which can fade plastic components and degrade some materials faster than they would in other regions. Resin or metal-bodied lights handle coastal UV better than all-plastic designs.
High-altitude locations receive even more solar intensity, which is excellent for solar charging. The primarily limitation is temperature variations. High-altitude nights are often much colder, which can affect battery performance. Bring lights indoors during winter if you’re in a very cold high-altitude location.
Seasonal Adjustment Strategies
The sun’s path shifts noticeably between summer and winter. A location that’s perfect in June might be partially shaded in December. For maximum year-round performance, consider seasonal adjustments.
The simplest approach is accepting that your lights will perform differently by season. They’ll be bright and run long in summer when the sun is high and available for extended hours. In winter, they’ll be dimmer and run shorter because the sun is lower and available for fewer hours. This is normal and expected.
If you want consistent performance year-round, position lights to optimize for winter sun angles. Winter is when you most need the light anyway (due to longer nights), so optimizing for winter is practical. In summer, the abundant sun will provide even better performance than necessary.
Another approach is having two sets of lights: one positioned for optimal summer performance and another for optimal winter performance. In June, install the summer set in their ideal locations. In December, switch to the winter-optimized set. This is more work but provides consistent performance year-round.
Adjusting light positions seasonally is also an option. In winter, move lights away from shaded areas and into the best available sun exposure. In summer, you have more flexibility. This approach requires more effort but provides good results if you’re committed to maintenance.
Optimizing for Specific Light Types
Hanging Lanterns and String Lights
Hanging lights need positioning where they get sun during charging but are visible in your outdoor space during use. This sometimes creates competing priorities.
A hanging lantern mounted under a pergola gets shade all day and won’t charge well. Better to mount it on the side of the pergola where it gets full sun, even if this means it’s slightly off from where you might prefer it aesthetically.
For string lights, position the solar panel pod where it receives direct south-facing sun. The string itself can extend in other directions and through shaded areas. Only the panel needs sun; the light bulbs along the string can illuminate shaded areas without issue.
Pathway and Stake Lights
These lights work best when elevated on stakes rather than sitting on the ground. A 12-18-inch stake gets the solar panel above ground clutter and into better sunlight.
If you have areas that are persistently shady, consider skipping lights there entirely rather than installing lights that won’t work. Concentrating lights in sunny spots creates better overall illumination than spreading them thinly everywhere.
Portable Lights
Portable solar lights offer flexibility. You can position them for optimal charging during the day, then reposition them for evening use if needed. This is useful if your main entertaining space is somewhat shaded during daylight but you still want evening illumination there.
The workflow: during the day, position lights in full sun where they’ll charge properly. In the evening, carry them to your entertaining area and position them there. This works well for occasional use but is impractical for permanent installations.
Case Study: Optimizing Solar Lights in a Mixed-Sun Yard
Background
A property owner had a large patio with partial afternoon shade from tall trees. Morning sun was excellent, but from 2 PM onward, the patio was in progressive shade. She wanted solar lights for entertaining but was frustrated with their dim performance by evening.
Project Overview
She initially placed lights throughout the patio area in the most convenient locations for aesthetics. This meant many lights were in afternoon shade, charging poorly and performing weakly.
Implementation
After analyzing sun patterns throughout the day, she repositioned all lights to the eastern (sunny) side of the patio. She used a mix of pathway lights along the edges and a few accent lights near the house. All lights were positioned to face south while still illuminating the patio space from the eastern perimeter.
She pruned back two lower tree branches that were casting shade on her light positions and ensured the solar panels on all lights were clean and oriented toward the south.
Results
By moving lights away from afternoon shade areas and into the best-available morning sun, light performance improved dramatically. What had been barely visible lights at 10 PM now provided comfortable illumination for entertaining at that time. The key realization was that perfect placement aesthetically mattered less than having lights that actually worked. She’d rather have lights positioned slightly off-center that perform well than ideally-positioned lights that barely glow.
Expert Insights From Our Solar Panel Installers
One of our senior solar panel installers with over 14 years of experience notes: “Placement determines everything with solar lights. Ninety percent of people who complain that their solar lights don’t work have actually just placed them in the shade. Once they move the lights to a sunny spot, the problem disappears. This teaches an important lesson about solar in general: location and sun exposure are everything. People start with garden lights, learn this lesson, and later when they think about home solar, they already understand why south-facing roof placement matters. Solar education starts small.”
Frequently Asked Questions
Can solar lights work on north-facing areas?
Solar lights work poorly on north-facing surfaces because they never receive direct sun. The north side of buildings and structures stays in shadow throughout the day. You might get diffuse light, but not the direct charging you need for good performance. Choose south-facing placement whenever possible, or accept significantly reduced performance on north-facing sites.
How much shade is too much for solar lights?
Partial shade for up to 2 hours per day is tolerable. Deep shade for more than 2 hours during peak charging hours (10 AM to 4 PM) is too much. Complete shade all day makes solar lights essentially non-functional. If a location is shaded for more than 4-6 hours per day, don’t install solar lights there.
Do solar panels need to be angled at a specific angle?
For optimal performance, angle the panel toward the sun. In practice, a vertical or slightly tilted orientation (15-30 degrees from vertical) works well. The exact angle is less critical than sun exposure. A vertical panel in full sun will work better than a perfectly-angled panel in shade.
Can solar lights work under trees?
Some solar lights can work under trees that have light, filtered shade. Never place them under dense, dark trees. If you can read a newspaper under the tree at noon, the light can probably charge reasonably well there. If you can’t see well, the light won’t charge adequately.
What about placing solar lights near reflective surfaces?
Reflective surfaces like white walls, light-colored pavement, or water features can actually boost solar charging by reflecting additional light toward the panel. This isn’t a substitute for direct sun, but it can provide a modest boost if you have reflective surfaces nearby. Dark surfaces absorb light and reduce charging, so avoid placing lights near dark walls or asphalt.
Should I clean solar panels regularly?
Yes, dust, pollen, and debris reduce charging efficiency significantly. Clean solar panels once or twice per season with a soft, damp cloth. In areas with heavy pollen or dust, clean more frequently. This simple maintenance can improve light performance by 20-30%.
Do solar lights work in cloudy climates?
Solar lights work in cloudy climates but with reduced performance. Even on cloudy days, some diffuse sunlight reaches the panels. Expect runtime and brightness to be 30-50% lower than in sunny climates. Premium solar lights with larger panels handle cloudy conditions better than budget models.
Can I use mirrors to direct sunlight toward solar panels?
Theoretically yes, practically it rarely works well. Mirrors would need to be adjusted seasonally, and any dust or misalignment reduces effectiveness. A simpler approach is just moving the light itself to a sunnier location. That’s more reliable than trying to redirect sun with mirrors.
What’s the best height for solar lights?
Elevated placement (2-3 feet high on a stake or mounted on a structure) gets the solar panel away from ground-level clutter and shadow. Ground-level placement works but performs slightly worse due to shade from nearby plants and garden features. Higher mounting (6-10 feet on a security light) provides the best charging and widest illumination coverage.
Summing Up
The most common reason solar lights disappoint is poor placement. Before blaming the lights themselves, evaluate their sun exposure. Lights in shaded areas will never perform well regardless of their quality or price.
Optimal placement follows simple rules: aim for south-facing orientation, ensure 4-6 hours of direct, unobstructed sun during peak hours, avoid shade from trees and structures, and consider elevated placement over ground-level when possible. Clean the solar panels occasionally and adjust positions seasonally if pursuing year-round optimization.
Start by observing your yard’s sun patterns throughout the day. Find the spots that receive the most sun, especially during the 10 AM to 4 PM charging window. Position your solar lights there, even if it’s not the most convenient aesthetic location. Lights that actually work will ultimately please you more than perfectly-positioned lights that barely glow.
If you’re planning a major outdoor renovation that might affect sun exposure for future solar lighting, consider calling us at (855) 427-0058 for a free consultation. We can discuss how solar lighting fits into a broader home solar strategy and ensure your outdoor space is optimized for solar power.
Updated